16: HTML lists
11th October 2012: Material moved to webplatform.org
The Opera web standards curriculum has now been moved to the docs section of the W3C webplatform.org site. Go there to find updated versions of these docs, and much more besides!
12th April 2012: This article is obsolete
The web standards curriculum has been donated to the W3C web education community group, to become part of a much bigger educational resource. It is constantly being updated so that it remains current with modern web design practices and technologies. To find the most up-to-date web standards curriculum, visit the web education community group Wiki. Please make changes to this Wiki yourself, or suggest changes to Chris Mills, who is also the chair of the web education community group.
Introduction
Lists are used to group related pieces of information together, so they are clearly associated with each other and easy to read. In modern web development lists are workhorse elements, frequently used for navigation as well as general content.
Lists are good from a structural point of view as they help create a well-structured, more accessible, easy-to-maintain document. They are also useful for a purely practical reason—they give you extra elements to attach CSS styles to, for a whole variety of styling (we'll get on to CSS later in the course - check out the Styling lists and links article first, and then visit the table of contents for the full list of CSS articles available.).
In this article, I will cover the different list types available in HTML, when and how you should use them, with a couple of practical examples at the end. The table of contents is as follows (and look — it's a list!):
- The three list types
- Choosing between list types
- The difference between HTML lists and text
- Nesting lists
- Step by step example
- Summary
- Further reading
- Exercise questions
The three list types
There are three list types in HTML:
- unordered list—used to group a set of related items, in no particular order.
- ordered list—used to group a set of related items, in a specific order.
- definition list—used to display name/value pairs such as terms and their definitions, or times and events.
Each one has a specific purpose and meaning—they are not interchangeable!
Unordered lists
Unordered lists, or bulleted lists, are used when a set of items can be placed in any order. An example is a shopping list:
- milk
- bread
- butter
- coffee beans
These items are all part of one list, however, you could put the items in any order and the list would still make sense:
- bread
- coffee beans
- milk
- butter
You can use CSS to change the bullet to one of several default styles, use your own image, or even display the list without bullets—we’ll look at how to do that in the Styling lists and links article.
Unordered list markup
Unordered lists use one set of <ul></ul> tags, wrapped around many sets of <li></li>:
<ul>
  <li>bread</li>
  <li>coffee beans</li>
  <li>milk</li>
  <li>butter</li>
</ul>
Ordered lists
Ordered lists, or numbered lists, are used to display a list of items that need to be placed in a specific order. An example would be cooking instructions, which must be completed in order for the recipe to work:
- Gather ingredients
- Mix ingredients together
- Place ingredients in a baking dish
- Bake in oven for an hour
- Remove from oven
- Allow to stand for ten minutes
- Serve
If the list items were moved around into a different order, the information would no longer make sense:
- Gather ingredients
- Bake in oven for an hour
- Remove from oven
- Serve
- Place ingredients in a baking dish
- Allow to stand for ten minutes
- Mix ingredients together
Ordered lists can be displayed with one of several numbering or alphabetic systems—that is, letters or numbers. The default in most browsers is decimal numbers, but there are more options:
- Letters
- Lowercase ascii letters (a, b, c…)
- Uppercase ascii letters (A, B, C…).
- Lowercase classical Greek: (έ, ή, ί…)
- Numbers
- Decimal numbers (1, 2, 3…)
- Decimal numbers with leading zeros (01, 02, 03…)
- Lowercase Roman numerals (i, ii, iii…)
- Uppercase Roman numerals (I, II, III…)
- Traditional Georgian numbering (an, ban, gan…)
- Traditional Armenian numbering (mek, yerku, yerek…)
Again, you can use CSS to change the style of your lists.
Ordered list markup
Ordered lists use one set of <ol></ol> tags, wrapped around many sets of <li></li>:
<ol>
  <li>Gather ingredients</li>
  <li>Mix ingredients together</li>
  <li>Place ingredients in a baking dish</li>
  <li>Bake in oven for an hour</li>
  <li>Remove from oven</li>
  <li>Allow to stand for ten minutes</li>
  <li>Serve</li>
</ol>
Beginning ordered lists with numbers other than 1
It is possible to get an ordered list to start with a number other than 1 (or i, or I, etc.). This is done using the start attribute, which takes a numeric value, even if you’re using CSS to change the the list counters to be alphabetic or roman using the list-style-type property. This is useful if you have a single list of items, but you want to break the list up with some kind of note, or some other related information. For example, we could do this with the previous example:
<ol>
  <li>Gather ingredients</li>
  <li>Mix ingredients together</li>
  <li>Place ingredients in a baking dish</li>
</ol>

<p class="note">Before you place the ingredients in the baking dish, preheat the oven to 180 degrees centigrade/350 degrees farenheit in readiness for the next step</p>

<ol start="4">
  <li>Bake in oven for an hour</li>
  <li>Remove from oven</li>
  <li>Allow to stand for ten minutes</li>
  <li>Serve</li>
</ol>
This gives the following result:
- Gather ingredients
- Mix ingredients together
- Place ingredients in a baking dish
Before you place the ingredients in the baking dish, preheat the oven to 180 degrees centigrade/350 degrees farenheit in readiness for the next step
- Bake in oven for an hour
- Remove from oven
- Allow to stand for ten minutes
- Serve
Note that this attribute is actually deprecated in the latest version of the HTML spec, which means that it will cause your pages to not validate when using strict doctypes. This may seem odd, as the attribute makes sense, and there is no direct CSS equivalent. This shows that validating HTML is an ideal goal to follow, but not always the absolute be all and end all. In addition, we have another leg to stand on — the start attribute is no longer deprecated in the HTML5 spec (the HTML 5 differences from HTML4 document attests to this). If you want to make use of such functionality in an HTML4 strict page, and it absolutely has to validate, you can do it using CSS Counters instead.
Definition lists
Definition lists associate specific items and their definitions within the list. For example, if you wanted to give a definition to the items on your shopping list, you could do that like so:
- milk
- A white, liquid dairy product.
- bread
- A baked food made of flour or meal.
- butter
- A yellow, solid dairy product.
- coffee beans
- The seeds of the fruit from certain coffee trees.
Each definition and term is a definition group (or name-value group). You can have as many definition groups as you like, but there must be at least one term and at least one definition in each group. You can’t have a term with no definition or a definition with no term.
You can associate more than one term with a single definition, or vice versa. For example, the term "coffee" can have several meanings, and you could show them one after the other:
- coffee
- a beverage made from roasted, ground coffee beans
- a cup of coffee
- a social gathering at which coffee is consumed
- a medium to dark brown colour
Alternatively you can have more than one term with the same definition. This is useful to show variations of a term, all of which have the same meaning:
- soda
- pop
- fizzy drink
- cola
- A sweet, carbonated beverage.
Definition lists are different from the other kinds of list, as they use definition terms and definition descriptions instead of list items.
So, definition lists use one set of <dl></dl> elements, wrapped around groups of <dt></dt> and <dd></dd> tags. You must pair at least one <dt></dt> with at least one <dd></dd>; the <dt></dt> should always be first in the source order.
A simple definition list of single terms with single definitions would look like this:
<dl>
  <dt>Term</dt>
  <dd>Definition of the term</dd>
  <dt>Term</dt>
  <dd>Definition of the term</dd>
  <dt>Term</dt>
  <dd>Definition of the term</dd>
</dl>
This is rendered as follows:
- Term
- Definition of the term
- Term
- Definition of the term
- Term
- Definition of the term
In this example, we associate more than one term with a definition, and vice versa:
<dl>
  <dt>Term</dt>
  <dd>Definition of the term</dd>
  <dt>Term</dt>
  <dt>Term</dt>
  <dd>Definition that applies to both of the preceding terms</dd>
  <dt>Term that can have both of the following definitions</dt>
  <dd>One definition of the term</dd>
  <dd>Another definition of the term</dd>
</dl>
Which would render as follows:
- Term
- Definition of the term
- Term
- Term
- Definition that applies to both of the preceding terms
- Term that can have both of the following definitions
- One definition of the term
- Another definition of the term
In general, it is unusual to associate multiple terms with a single definition, but it is useful to know it is possible in case the need arises.
Choosing between list types
When trying to decide what type of list to use, you can usually decide by asking two simple questions:
- Am I defining terms (or associating other name/value pairs)?
- If yes, use a definition list.
- If no, don’t use a definition list—go on to the next question.
- Is the order of the list items important?
- If yes, use an ordered list.
- If no, use an unordered list.
The difference between HTML lists and text
You may be wondering what the difference is between an HTML list and some text with bullets or numbers written in by hand. Well, there are several advantages to using an HTML list:
- If you have to change the order of the list items in an ordered list, you simply move them around in the HTML. If you wrote the numbers in manually you would have to go through and change every single item’s number to correct the order—which is tedious to say the least!
- Using an HTML list allows you to style the list properly - you can use CSS to style just the list elements. If you just use a blob of text, you will find it more difficult to style the individual items in any useful manner, as the elements used will be the same as used for every other piece of text.
- Using an HTML list gives the content the proper semantic structure, as well as a "list-ish" visual effect. This has important benefits such as allowing screen readers to tell users with visual impairments they are reading a list, rather than just reading out a confusing jumble of text and numbers.
To put it another way: text and lists are not the same. Using text instead of a list makes more work for you and can create problems for your document’s readers. So if your document needs a list, you should use the correct HTML list.
Nesting lists
A list item can contain another entire list—this is known as "nesting" a list. It is useful for things like tables of contents, such as the one at the start of this article:
- Chapter One
- Section One
- Section Two
- Section Three
- Chapter Two
- Chapter Three
The key to nesting lists is to remember that the nested list should relate to one specific list item. To reflect that in the code, the nested list is contained inside that list item. The code for the list above looks as follows:
<ol>
  <li>Chapter One
    <ol>
      <li>Section One</li>
      <li>Section Two </li>
      <li>Section Three </li>
    </ol>
  </li>
  <li>Chapter Two</li>
  <li>Chapter Three  </li>
</ol>
Note how the nested list starts after the <li> and the text of the containing list item (“Chapter One”); then ends before the </li> of the containing list item. Nested lists often form the basis for website navigation menus, as they are a good way to define the structure of the website.
Theoretically you can nest as many lists as you like, although in practice it can become confusing to nest lists too deeply. For very large lists, you may be better off splitting the content up into several lists with headings instead, or even splitting it up into separate pages.
Step by step example
Let’s run through a step by step example, to put all of this together. Consider the following scenario:
You are creating a small website for the HTML Cooking School. On the main page, you are to show a list of categorised recipes, linking through to recipe pages. Each recipe page lists the ingredients required, notes on those ingredients and the preparation method. The three categories are Cakes (including recipes for “Plain Sponge”, “Chocolate Cake” and “Apple Tea Cake”); “Biscuits” (including recipes for “ANZAC Biscuits”, “Jam Drops” and “Melting Moments”); and “Quickbreads” (including recipes for “Damper” and “Scones”). The client doesn’t mind what order the categories and recipes are shown; they just want to be sure people know which items are categories and which ones are recipes.
Let’s step through the process of creating this site.
Main page markup
Create a properly-formed HTML page, including a doctype,
html,headandbodyelements, and save it as stepbystep-main.html. Add a main heading (h1) of “HTML Cooking School”, and a subheading (h2) of “Recipes”:<h1>HTML Cooking School</h1>
<h2>Recipes</h2>-
You have three categories of recipe to represent, and the order is not important—an unordered list is most appropriate for these, so add the following to your page:
<h2>Recipes</h2>
  <ul>
  <li>Cakes</li>
  <li>Biscuits</li>
  <li>Quickbreads</li>
</ul>
Indenting the
lielements makes the code more readable, but it is not required. -
Now you need to add the recipes as sub-items, for example “Plain Sponge”, “Chocolate Cake” and “Apple Tea Cake” are all part of the “Cakes” category. To do this, you need to create a nested list within each item. Since the order is not important, once again unordered lists are appropriate. To make things easier for the tutorial, I’ll get you to link all of the recipes to one single recipe page (Article 18 explains HTML links in depth. Visit there if you want to read about links):
<h2>Recipes</h2>
<ul>
  <li>Cakes
    <ul>
      <li><a href="stepbystep-recipe.html">Plain Sponge</a></li>
      <li><a href="stepbystep-recipe.html">Chocolate Cake</a></li>
      <li><a href="stepbystep-recipe.html">Apple Tea Cake</a></li>
    </ul>
  </li>
  <li>Biscuits
    <ul>
      <li><a href="stepbystep-recipe.html">ANZAC Biscuits</a></li>
      <li><a href="stepbystep-recipe.html">Jam Drops</a></li>
      <li><a href="stepbystep-recipe.html">Melting Moments</a></li>
    </ul>
  </li>
  <li>Breads/quickbreads
    <ul>
      <li><a href="stepbystep-recipe.html">Damper</a></li>
      <li><a href="stepbystep-recipe.html">Scones</a></li>
    </ul>
  </li>
</ul>
The final result should be something similar to Figure 1:
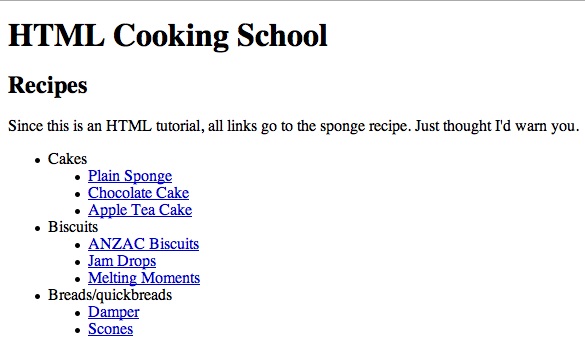
Figure 1: The finished main page.
You can also view the live example page here.
The recipe page
For the sake of the example, we will just create the sponge cake recipe page—feel free to create the others yourself, using this one as a template. The HTML Cooking School has supplied the sponge recipe to you in a text file, looking like this:
Simple Sponge Cake
Ingredients
3 eggs
100g castor sugar
85g self-raising flour
Notes on ingredients:
Caster Sugar - Finely granulated white sugar.
Self-raising flour - A pre-mixed combination of flour and leavening agents (usually salt and baking powder).Method
1. Preheat the oven to 190°C.
2. Grease a 20cm round cake pan.
3. In a medium bowl, whip together the eggs and castor sugar until fluffy.
4. Fold in flour.
5. Pour mixture into the prepared pan.
6. Bake for 20 minutes in the preheated oven, or until the top of the cake springs back when lightly pressed.
7. Cool in the pan over a wire rack.
Recipe page markup
-
Create another properly-formed HTML document, and save it as stepbystep-recipe.html. Add the following headings to it:
<h1>Simple Sponge Cake</h1> <h2>Ingredients</h2> <h3>Notes on ingredients</h3> <h2>Method</h2> -
The ingredients list has several items but the order isn’t important. An unordered list therefore makes sense. Add the following into the
bodyof your HTML:<h2>Ingredients</h2> <ul> <li>3 eggs</li> <li>100g castor sugar</li> <li>85g self-raising flour</li> </ul>
-
The notes on the ingredients are there to properly define what some of the ingredients are. You need to associate the ingredient—the term—with its definition. A definition list is right for this purpose. Add the following to your HTML, below the unordered list in the previous step:
<h3>Notes on ingredients</h3> <dl> <dt>Castor Sugar</dt> <dd>Finely granulated white sugar.</dd> <dt>Self-raising flour</dt> <dd>A pre-mixed combination of flour and leavening agents (usually salt and baking powder).</dd> </dl> -
The method must obviously follow a single correct order, so it should be an ordered list—add the following to your HTML, below the definition list:
<h2>Method</h2>
<ol>
  <li>Preheat the oven to 190°C.</li>
  <li>Grease a 20cm round cake pan.</li>
  <li>In a medium bowl, whip together the eggs and castor sugar until fluffy.</li>
  <li>Fold in flour.</li>
  <li>Pour mixture into the prepared pan.</li>
  <li>Bake for 20 minutes in the preheated oven, or until the top of the cake springs back when lightly pressed.</li>
  <li>Cool in the pan over a wire rack.</li>
</ol>
The page should look something like Figure 2:
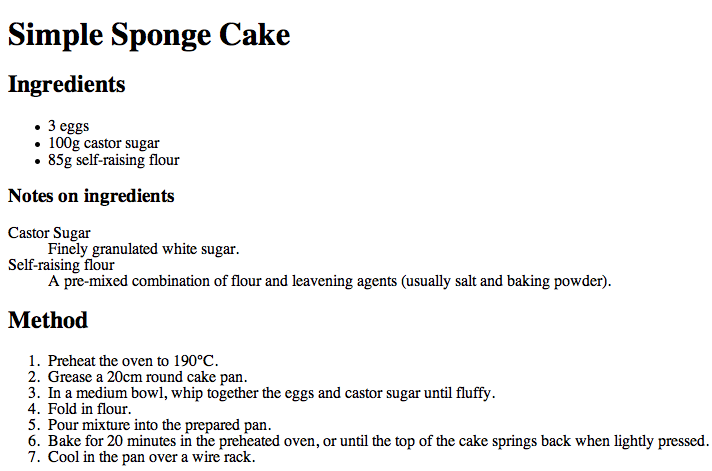
Figure 2: The finished recipe page.
You can also view the live example page here.
You’re done!
Summary
By this stage you should have a clear understanding of the three different list types in HTML. Using the step-by-step example, you should have created all three and learned how to nest lists inside list items.
Once you know how to use HTML lists properly, you will probably discover that you use them all the time. There is a lot of content on the web that should have been placed into a list, but was just thrown into a generic element with some line break tags. It’s a lazy practice that causes far more problems than it solves—so don’t do it! You should always create semantically correct lists to help people read your websites. It is a better practice for everyone, not least yourself when you need to maintain your sites later on.
Further reading
Exercise questions
Questions you should be able to answer:
- What are the three types of HTML list?
- When would you use each type of list? How would you choose between them?
- How do you nest lists?
- Why should you use CSS rather than HTML to style your lists?
About the author

Ben Buchanan started creating web pages more than ten years ago, while completing a degree in everything but IT. He has worked in both the public (university) and private sectors; and worked on the redevelopment of major websites including The Australian and three generations of Griffith University’s corporate website. He now works as Frontend Architect for News Digital Media and writes at the 200ok weblog.
This article is licensed under a Creative Commons Attribution, Non Commercial - Share Alike 2.5 license.
Comments
The forum archive of this article is still available on My Opera.
No new comments accepted.