interface version 2
Sets up a snapping point (and/or direction) based on an input geometry.
Snaptools provides a toolkit to “snap” or align one geometry to another, using up to three points on the source and target geometry for matching.
A snapping network consists of one or more Snap/Point nodes, then a Snap/Xform qL node. Each Point can add a new snapping point (or direction), and the Xform performs the transformation, based on the information set up by the Point nodes.
Workflow
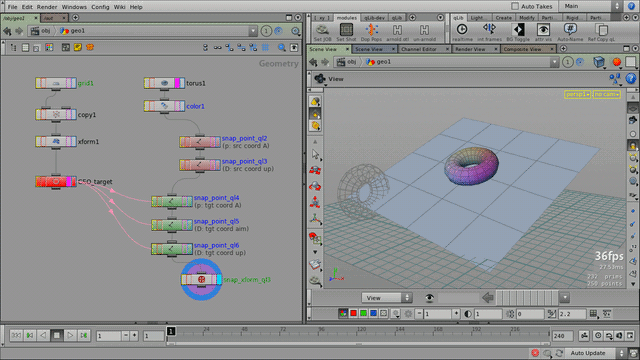
Procedural snapping: after defining source (red) and target (green) reference points, the torus is snapped and aligned onto the target surface (a grid).
How to set up a point (snapping component)
Open a Parameter panel for a Snap Point qL SOP (also, make sure the OP has the display flag)
Specify the reference geometry (it’s either the connected input, or another SOP drag-and-dropped into the SOP Path field)
Press the Display Selection Geometry: this displays the reference geometry
Specify the geometry components
for point: use src/tgt coord A/B/C
for dir: use src/tgt Aim or Up, from/to an already existing A/B/C point
press Done Editing
use the “Add New...” convenience buttons to build next element of the OP chain
Parameters
| SOP Path | If enabled, this path specifies the geometry where the snapping component (point or direction) will be extracted from (reference geometry). If disabled, the input geometry is used. | ||||||
| Display Selection Geo | Pressing this button will display the reference geometry. If there are selected primitives and/or points (see below), only those parts will be displayed. Tip Workflow tip: press this button before tuning the parameters. It ensures proper visualization of the geometry component selections. | ||||||
| Selection Mode | The way of extracting a 3d point coordinate from the reference geometry.
| ||||||
| ... | ... | ||||||
| Done Editing | Press this button once all parameters are set up. Tip Workflow tip: always press this button once all parameters are set up as desired. This ensures that the proper geometry and data is passed to downstream operators. |
To Do
Option for extracting directions from (per-point) vector attributes
Release Notes
interface version 2 —
| 2014-02-26 |
|
interface version 1 —
| 2013-05-14 | First prototype. |