Opera Desktop Widgets evolved
This article is now obsolete - an updated version can be found at Opera Widgets as standalone applications
Introduction
Opera Widgets are made using Web standards, the same technology used to build Web pages. This ensures that they work on all platforms and operating systems, as well as giving a much shorter and simpler development cycle to desktop applications.
Ever since widgets became part of Opera’s desktop browser in 2006 they have been dependent on the browser in many respects. Widgets are managed from within the browser and they run as long as the browser runs.
Opera Widgets for desktop breaks this dependency between widgets and the browser interface. In short, as long as you have Opera installed, you can run any widget you like, without ever opening the browser.
This release gives you a preview of the changes that Opera has planned for widgets. Widgets are getting a complete make-over from being small, single-purpose gadgets to first-class citizens with the power to replace native applications.
In this article, we have a closer look at the main changes and new features included with Opera Widgets for desktop.
Download process
A new, better approach has been introduced for downloading widgets via Opera. This mechanism takes advantage of Opera’s download manager to give you more flexibility while your favorite widgets are being downloaded. You can use this time to look for some other widgets or simply surf the Web, and as soon as the widget download completes, Opera will automatically trigger the widget installer.
From now on, you can also download widgets via different browsers and Opera’s widget runtime will take care of the installation. The widget runtime is registered in the system as one of the .wgt filetype application handlers, so it will be listed among applications capable of handling widget files.
Installation/Uninstallation process
The installation and uninstallation processes have changed a lot with Opera’s new widget runtime. Widget management has been moved from within Opera into the operating system. Widgets now integrate better with the platform via shortcuts and launch scripts (depending on the host platform), and are listed together with other applications belonging to the OS. The widget runtime is equipped with a graphical widget installer that facilitates the widget deployment process.
Widget installation can be triggered in several ways:
- Download the widget via Opera — the widget installer will run automatically after download
- Double click on a .wgt file in your file system
- Drag and drop a .wgt file onto Opera
- Type in the system console, e.g. for Windows:
opera.exe -widget [widget path]\[widget name].wgt
The following section describes the installation process for the various desktop platforms:
Windows:
On Windows, a graphical widget installer guides you through the installation process. The default settings should be fine in most cases. Click the Install button to perform the installation.

Figure 1: The Widget installation dialog box for Windows
The widget installer will extract the content into the widget installation folder and create shortcuts under Programs in the Start Menu, on the Desktop, and in the Quick Launch Bar.
You can customize your installation by clicking the Customize... button in the installer.

Figure 2: The Widget installation settings dialog box for Windows
The Widget Installation Settings dialog makes it possible to customize the following items:
- Widget name
- Installation folder
- Shortcut placement
A widget can be uninstalled in the same way as any other application:
- Control Panel > Add/Remove Programs on Windows XP and previous
- Control Panel > Programs > Uninstall Programs on Windows Vista and later
During the uninstallation process you will be prompted to confirm whether you really want to remove the widget.
Uninstalling a widget does not remove its settings, so if you decide to reinstall the same widget, your settings will be reused.
Linux:
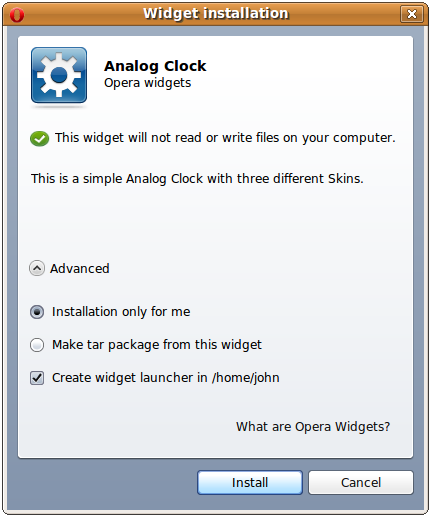
Figure 3: The Widget installation dialog box for Linux
The default installation on Linux is for the current user only. A widget is accessible through its shortcut in the Applications menu. Advanced users can run widgets from the terminal using launcher scripts that are optionally placed in the ~/bin directory. Opera’s widget manager comes in handy when uninstalling widgets.
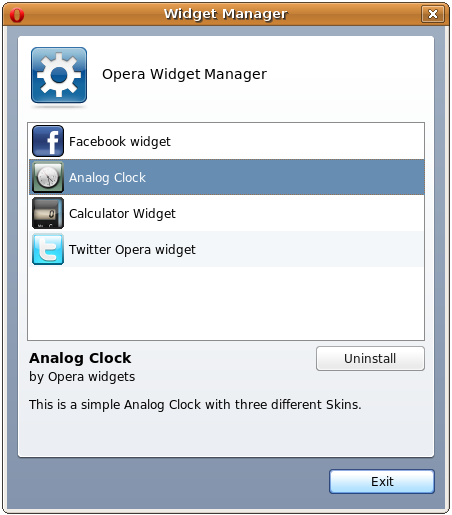
Figure 4: The Widget Manager dialog box for Linux
You can run Opera’s Widget Manager using its shortcut in the Applications menu. Select the widget you want to uninstall and click the Uninstall button. The widget’s private data will not be lost.
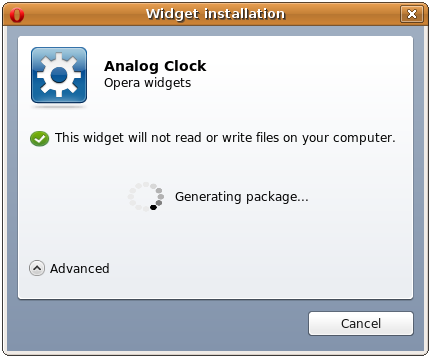
Figure 5: The Widget installation dialog box for Linux
One of the most useful features in the installation process is the ability to generate a platform-specific package for the widget. For example, if you are on Debian, you can generate a .deb package for the widget and install it in the same way as any other package. After installation of the package, all management of the widget is done by your system’s package manager. Three package types are supported: .deb, .rpm and .tar.
Mac:
The graphical widget installer on Mac has the same look and feel as the one used on Windows, while respecting the platform differences regarding installation settings. A default installation will create the widget bundle in the Applications folder. You can customize your installation settings by clicking the Customize... button on the installer.
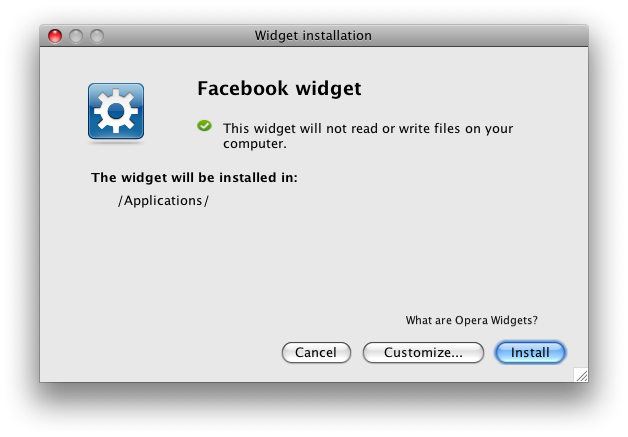
Figure 6: The Widget installation dialog box for Mac
The Widget Installation Settings dialog makes it possible to customize:
- Widget name
- Installation folder
A widget can be uninstalled in the same way as any other application, by dragging and dropping the widget bundle to the Trash.
Running Widgets
There are several ways to start a widget once it has been installed in your operating system:
Windows:
- Click/Double-click the widget shortcut
- Run [widget name].exe file from the widget installation folder
- Type in the system console:
opera.exe -widget [widget installation folder]\config.xml
Linux:
- Select the widget shortcut in the Applications menu.
- Type in the system terminal:
opera -widget [widget installation directory path]\config.xml(if opera installed globally). - Go to ~/bin and run the widget launcher script in the terminal.
Mac:
- Double-click the widget bundle in the installation folder (eg
/Applications/) - Type the name of the widget in Spotlight and choose the correct hint
For widgets to run, Opera’s desktop browser must be installed in the OS.
Import wizard
To continue using your current widgets in Opera’s new widget runtime, you need to first import them. Opera provides an easy and quick way to import your widgets into the new runtime. When you upgrade Opera, you will be greeted by the widget import wizard.

Figure 7: The Widget Import Wizard dialog box
You can import your widgets later via the menu File > Import > Import Widgets...
Password Manager
Opera’s widget runtime provides a Password Manager for any widget that requires user credentials. When you submit your login/password, you will be prompted by the Password Manager dialog to decide whether you want to save your credentials.

Figure 8: The Password Manager dialog box
The next time you access the login/password form in the widget, the data can be entered automatically via the appropriate keyboard shortcut (e.g. Ctrl+Enter).
You can always delete all saved passwords via the context menu item Preferences > Password Manager > Delete all passwords for this widget.
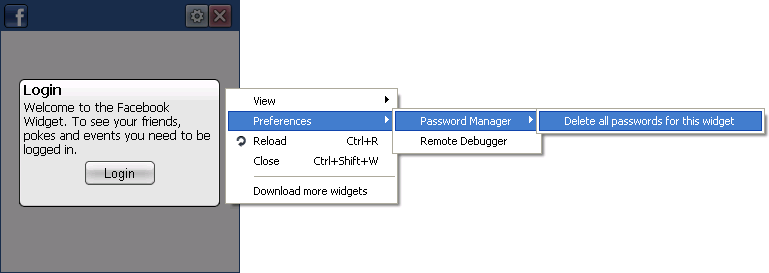
Figure 9: The context menu to delete passwords
Debugging
Opera supports two ways of debugging your widgets using Opera Dragonfly:
Local debugging
You simply drag and drop the config.xml file of the widget you are working on onto Opera’s desktop browser. Opera Dragonfly starts up automatically, ready to debug your widget.
In this scenario the widget is not installed via the graphical widget installer and will not be accessible from within the system.
Remote debugging
To debug your widget remotely you have to take the following steps:
- Start Opera and go to Tools > Advanced > Developer Tools (Opera Dragonfly will start up)
- Go to the Settings tab and the Remote Debug section
- Check the Remote Debug check box and adjust the port number to your needs.
- Click the Apply button on the right side of the section.
- Now start the widget you want to debug and open the remote debugging configuration dialog from the context menu Preferences > Remote Debugger.
- Enable remote debugging and specify the IP address and the port on which Opera Dragonfly listens and press the OK button.
- When the connection is complete you will be informed via a notification in the bottom right corner of the screen.
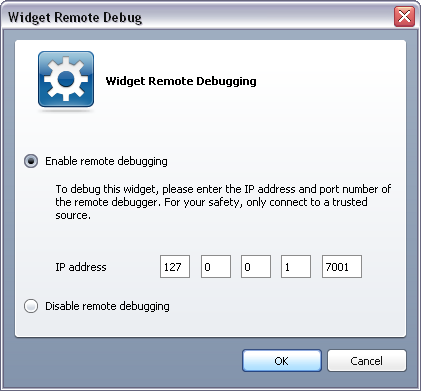
Figure 10: The remote debugging dialog box
Widget File I/O
The File I/O API provides functionality needed to access data on your file system from widgets, providing powerful hybrid Web/desktop capabilities. This feature becomes even more powerful now that widgets can run as standalone applications.
When a widget is installed, you will be notified whether the widget has access to your file system or not.

Figure 11: The widget File I/O dialog box
More information about File I/O for Widgets can be found in the Libraries section.
Notification system
Opera’s widget runtime supports a basic notification mechanism. Notifications appear in the bottom right corner of the screen when the widget calls the ShowNotification() function. The notification window consists of:
- Widget name
- Widget icon
- Text of the notification
Context menu
The widget context menu has been extended with new items to provide even better access to the most important options related to the widget:
- View options — Always On Top, Normal, Always Below, Zoom
- Preferences options – Remove All Remembered Passwords and Remote Debugging configuration dialog
- Download more widgets – this lets you download additional widgets from http://widgets.opera.com
Widgets in “Application” mode
Opera’s widget runtime introduces support for an additional mode called “Application” mode. Widgets in this mode are equipped with OS specific window decorations as seen in the picture.
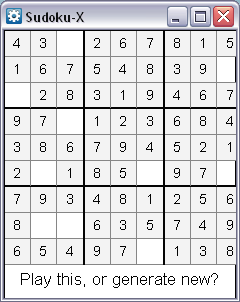
Figure 12: An example of Application Mode on a widget
This mode can be triggered by setting the defaultmode attribute in the config.xml's widget tag to application mode.
Example:
<?xml version='1.0' encoding='UTF-8'?>
<widget defaultmode="application">
  <widgetname>Sample widget</widgetname>
  <description>Shows the default chrome for application mode.</description>
</widget>
This provides the widget with minimize, maximize and close buttons automatically.
Conclusion
This is just a preview of what is to come. There are several enhancements planned for the features listed above as well as some exciting new ones. So, go get the Labs build and play with the Twitter and Facebook widgets we've provided. To give your own suggestions and join the discussion of our latest Opera Widgets implementation, join the widgets forum on My Opera.
This article is licensed under a Creative Commons Attribution, Non Commercial - Share Alike 2.5 license.
Comments
The forum archive of this article is still available on My Opera.
No new comments accepted.