 English
 Deutsch
 Русский
The Deskbar
By default at the top right corner of the desktop, the Deskbar is the hub of interacting with Haiku. You can start applications, applets and preferences from there, for example, and switch between running applications.
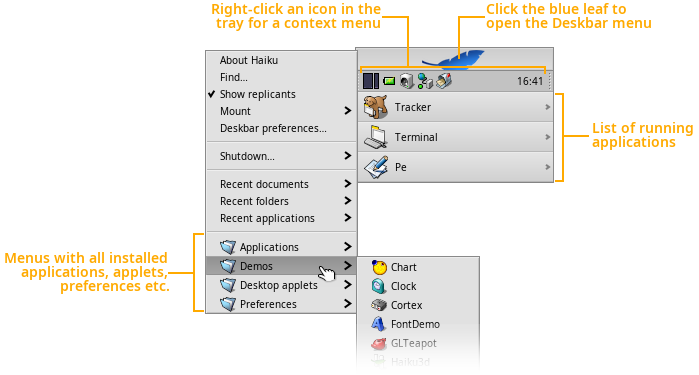
Deskbar
The window widgets
Here's a typical Haiku window with its usual widgets:
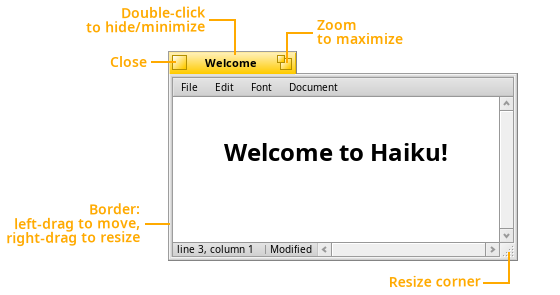
Haiku's GUI
The shortcut key
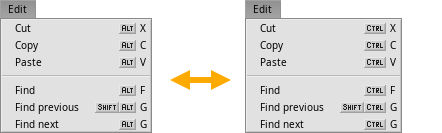
The Keymap preferences let you switch from the Haiku standard ALT key to CTRL (Windows/Linux mode). This is a global switch, so for example quitting a program in the shell will then be done with ALT C instead the usual CTRL C.
This inconsistancy is one reason for the default ALT shortcut in Haiku.
Shortcuts and key combinations
The Twitcher
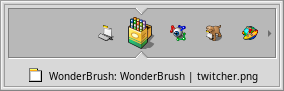
Holding CTRL TAB summons the Twitcher where you switch between running applications.
Tapping the TAB key only quickly while holding CTRL switches to the last used application.
Twitcher
The Team monitor
If some application crashed badly and maybe won't disappear from Deskbar's running application list, press CTRL ALT DEL to invoke the Team monitor. Here you can select an entry and kill a misbehaving app.
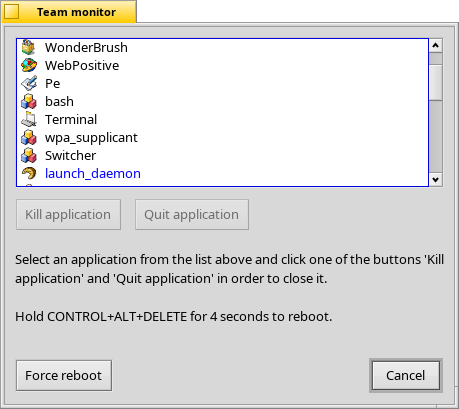
A neat way to quickly get rid of an app hanging in the Deskbar is the Vulcan Death Grip.
Hold SHIFT CTRL ALT and click on the offending entry in the Deskbar. Poof!
Team monitor
Window management: Move & Resize
Haiku offers a neat way to quickly move or resize windows:
Holding down CTRL ALT will highlight the window borders nearest to the mouse pointer.
Click and dragging with the right mouse button will resize the window along the highlighted border(s).
Click and drag with the left mouse button to move it around.

A quick way to move or resize windows
Window management: Stack
"Stacking" is putting windows on top of each other, automatically moving the yellow tabs into position.
While holding the OPT key (normally that's WIN on the keyboard), tabs change color when they overlap; drop the window to establish the stacking.
You un-stack by holding OPT and dragging a window out of its group by the yellow tab.
Stack & Tile
Window management: Tile
"Tiling" means gluing windows horizontally or vertically together.
While holding OPT, the borders that'll fuse together when you drop the window change color when brought near each other.
You un-tile by holding OPT and dragging a window out of its group by the yellow tab.
Stack & Tile
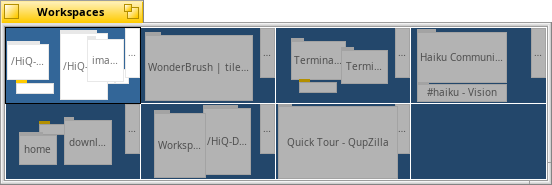
Workspaces
Workspaces are virtual desktops, complete with their own resolution, color depth and background.
Up to 32 of these workspaces can be set from the Screen preferences.
The Workspaces desktop applet can be used to change workspaces or to drag a window from one to another.
The quick keyboard shortcut to change workspaces is CTRL ALT ← / → / ↑ / ↓.
If you add SHIFT to that, the active window is taken with you to that workspace.
Replicants
Replicants are small self-contained parts of applications that can be integrated into the Desktop (and other programs).
Provided Deskbar's option to is activated, replicants are indicated by a small handle.
You can drag & drop them by the handle onto the Desktop, where they are fully functional without their parent app running.
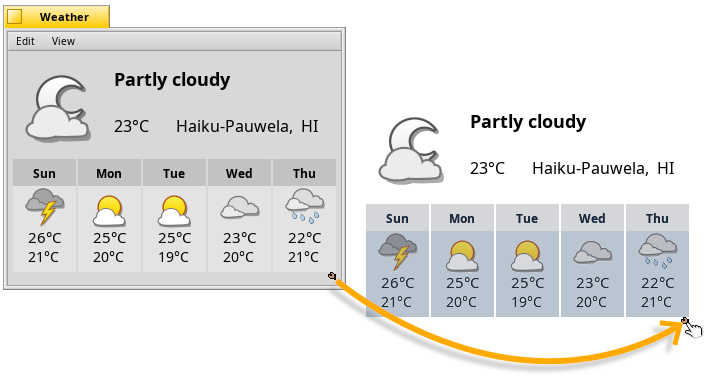
You can move a replicant by its handle and remove it with a right-click on it and choosing .
Replicants
Single window navigation
Double-clicking your way down folder after folder, you'll quickly end up with many open Tracker windows.
Holding the OPT key (normally WIN on the keyboard) prevents this as it automatically closes the parent folder.
Alternatively, you can activate from the Tracker preferences.
will add back/forward buttons.
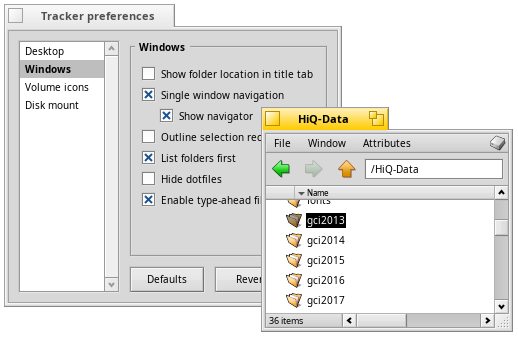
Tracker
Drill-down navigation
A nice alternative to opening a deep hierarchy of folders is called "drill-down navigation". Right-clicking a folder or anywhere in a Tracker window (or the Desktop) will open a context menu. Beside various expected commands, there's a menu of the current folder at the top that contains all its subfolders.
Drill your way down until you find the folder or file to open.
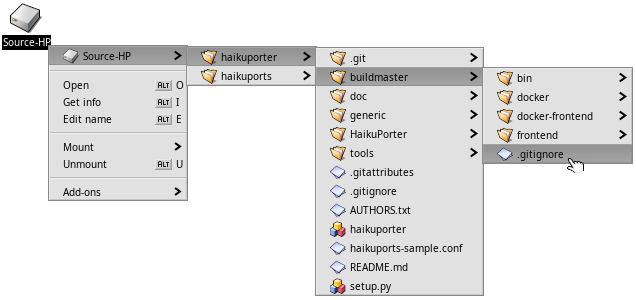
Tracker navigation
Mounting volumes
In order to access a harddisk, CD, USB stick etc., you first have to mount the volume. Once mounted, its icon appears on the Desktop.
This is done with a right-click on the Desktop or an already mounted volume (like the boot disk) and choosing the volume from the submenu. You find the same menu in the Deskbar. ISO images can be mounted with a double-click.
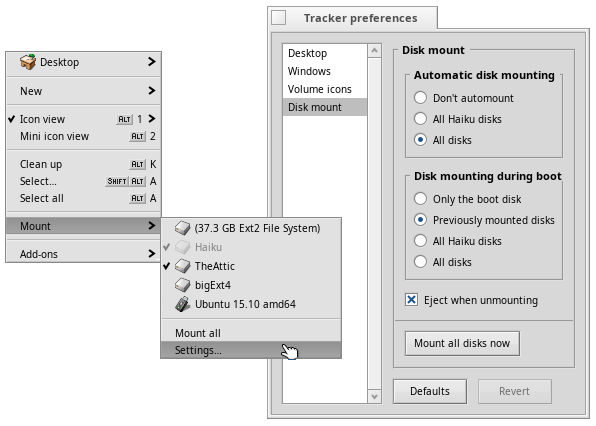
Mounting volumes
Filesystem layout
While Haiku is currently not multi-user, there are already two branches in the filesystem tree:
 /boot/system/ /boot/system/ | The system hierarchy contains system files and settings for all users. The package management makes most folders under /system effectively read-only. Packages contain all their files in a fixed folder hierarchy. Upon installation, a package gets "mounted" and all its files just appear to be in that hierarchy in the /system folder. The folders there (like add-ons, apps, bin etc.) are just a virtual amalgamation of all the installed packages and are therefore read-only. Exceptions are cache, non-packaged, settings, and var.
| |
 /boot/home/ /boot/home/ | The home hierarchy is your personal folder where you keep your data and settings. The folder /boot/home/config (or shortened ~/config) mirrors the /system folder described above and is likewise virtually read-only with the same exceptions of cache, non-packaged, settings, and var.
|
The writable non-packaged folders mirror the hierarchy of the /system or ~/config/ hierarchy (add-ons, apps, bin…).
Software that doesn't come in form of a HPKG package can be installed here.
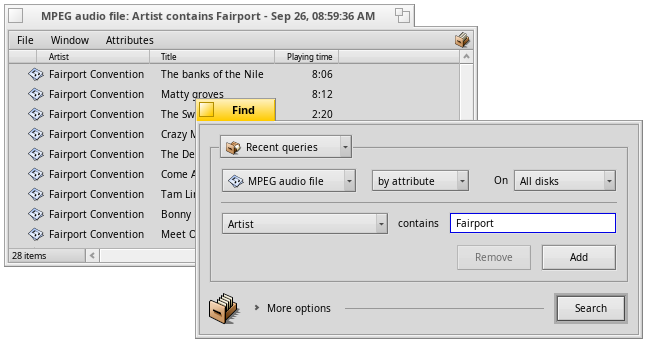
Finding files with queries
Files on Haiku formatted (BFS) volumes are quickly searched with from the Deskbar. Instead of file and folder names, you can also look through filetype specific attributes, e.g. for an artist in your MP3 collection.
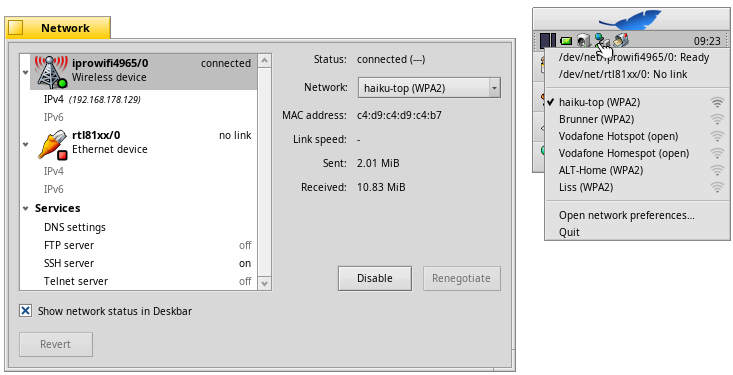
Wireless connection
You can connect to your WLAN router either by right-clicking the NetworkStatus icon in Deskbar's tray,
or by selecting your network from the Network preferences.
When the connection is established, you'll be asked for the network's encryption and password.
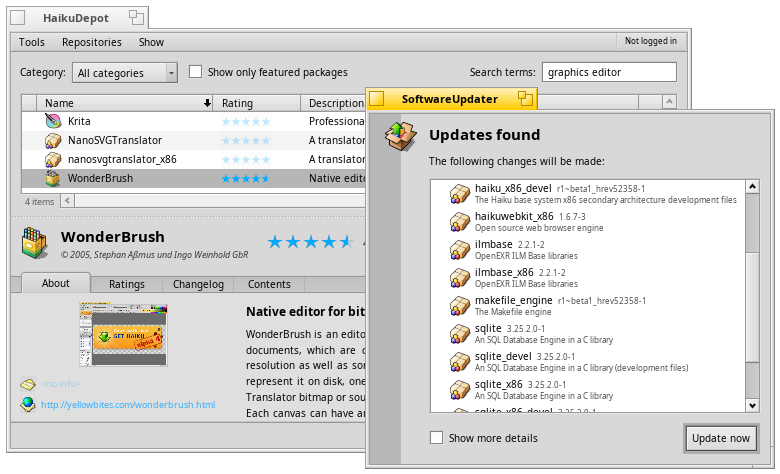
Getting more and updating software
HaikuDepot from the Deskbar's applications menu is where to search, install and uninstall software packages.
SoftwareUpdater should be started from time to time to update installed software as well as Haiku itself.
The end
This is the end of the tour. We hope it helped you to quickly feel at home in your new OS!
For more detailed information, check out the Welcome page and the User Guide.
You can also join our Webforum and main IRC channel #haiku to get help or discuss your ideas.
The Haiku website has information how to get involved in driving Haiku forward. You can also make financial donations.

Copyright 2018, Haiku Inc., Author: Humdinger