Introduction
JBoss Forge
It’s not so easy to explain what Forge is in a few paragraphs, so we will quote the introduction from Continuous Enterprise Development (a book):
If you’ve spent any time developing Java EE-based projects (or any nontrivial application, for that matter!), you’ve likely invested a good amount of energy in creating the project layout, defining dependencies, and informing the build system of the relevant class paths to be used in compilation and execution. Although Maven enables us to reduce that load as compared with undertaking project setup manually, there’s typically quite a bit of boilerplate involved in the pom.xml defining your requirements.
JBoss Forge offers an incremental project enhancement for Java EE. Implemented as a command shell and integration with some IDE, Forge gives us the ability to alter project files and folders. Some concrete tasks we might use Forge to handle are:
Adding Java Persistence API (JPA) entities and describing their model
Configuring Maven dependencies
Setting up project scaffolding
Generating a view layer, reverse-engineered from a domain model
Deploying to an application server
Because Forge is built atop a modular, plug-in-based architecture, it’s extensible to additional tasks that may be specific to your application. Overall, the goal of Forge is to ease project setup at all stages of development, so we’ll be employing it in this guide to speed along the construction of our examples.
What’s this lab about?
This hands-on-lab (HoL) should give you a good practical introduction to JBoss Forge. You will first install JBoss Forge, use it and then develop and entire Java EE application and create addons to extend the capabilities of Forge. Forge can either be used within an IDE, or directly in the system terminal via a command line interface (CLI).
The idea is that you leave this hands on lab (HoL) with a good understanding of what JBoss Forge is, what it is not, and how it can help you in your projects. Then, you’ll be prepared to investigate a bit more and, hopefully, contribute.
|
Note
|
Get this tutorial from https://github.com/forge/docs/tree/master/tutorials/forge-hol |
How does this lab work?
You have this material in your hands (either electronically or printed) and you can now follow it step by step or choose any section "à la carte". The structure of this hands on lab is as follow :
-
Installing Forge : in this section you will install JBoss Forge, either on a standalone mode, or with JBDS (JBoss Developer Studio)
-
Using Forge : in this section you will play with Forge, create a project, add entities, scaffold a JSF web application, REST endpoints, generate some Arquillian tests and deploy them on WildFly
-
Developing Forge : in this section you will quickly create a full web application, build forge addons, and use these addons in the application
If you have Forge already installed, skip to the Using Forge section and start using it. If you already know JBoss Forge a bit, jump to the section on Developing Forge and start hacking some addons. This "à la carte" mode allows you to make the most of this 3 hours long hands on lab.
What do you have to do?
This lab should be as self explanatory as possible. So your job is to follow the instructions by yourself, do what you are supposed to do, and do not hesitate to ask for any clarification or assistance, that’s why the team is here. Make sure you have the required software installed (see below) and be ready to have some fun!
Software requirements
The following software needs to be downloaded and installed:
-
JBoss Forge 3.0.0.CR1 or higher
Installing Forge
Installing Forge is a relatively short process, and this section will take you through the fundamentals (providing links to external materials if required); however, if you encounter any issues with this process, please ask in the team.
If you are a command line addict or are more confortable with a Eclipse, you can choose to install JBoss Forge CLI or JBDS.
Installing Forge CLI
Follow these steps to install a Forge distribution:
-
Ensure that you have already installed a Java 8+ JDK.
-
Download and Un-zip Forge into a folder on your hard-disk, this folder will be your
FORGE_HOME -
Add
$FORGE_HOME/binto your path (windows, linux, mac osx) -
Run JBoss Forge by typing the
forgecommand in your system terminal.
Windows
Extract the distribution archive, to the directory you wish to install Forge.
Add the FORGE_HOME environment variable.
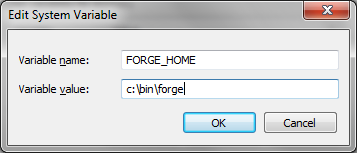
In the same dialog, add %FORGE_HOME%\bin to the system path.
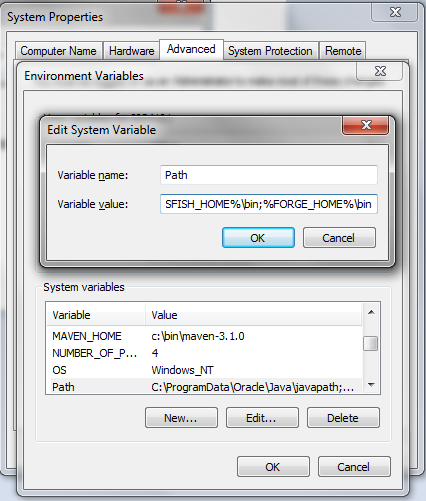
Now open a system cmd or command prompt and run JBoss Forge by typing the forge command.
|
Tip
|
If you have installed Forge 1.x before, make sure to remove all the files from the ~/.forge directory
|
Mac OS X or Linux
The easiest way to install Forge is to extract the distribution archive, to the directory you wish to install Forge. In a command terminal, add the FORGE_HOME environment variable, e.g:
export FORGE_HOME=/usr/local/jboss/forge-distribution-3.0.0.Beta2Add FORGE_HOME/bin environment variable to your path, e.g:
export PATH=$FORGE_HOME/bin:$PATHYou can also install Forge via cURL
curl http://forge.jboss.org/sh | shor use Homebrew to install Forge natively, via:
brew install jboss-forgeRun JBoss Forge by typing the forge command in your system terminal.
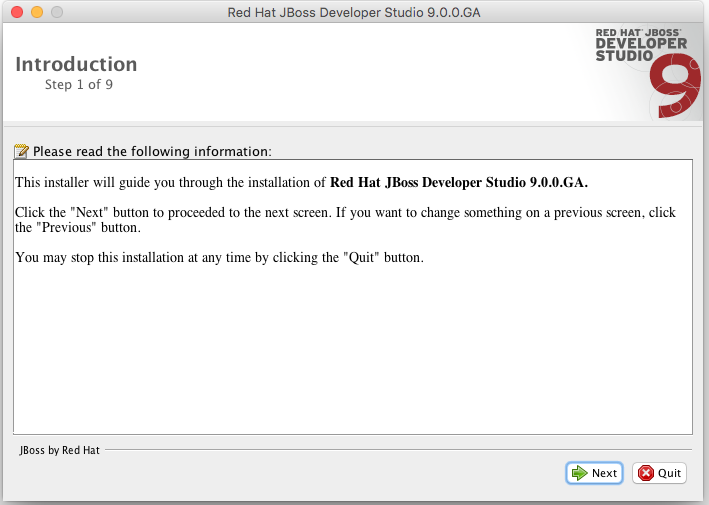
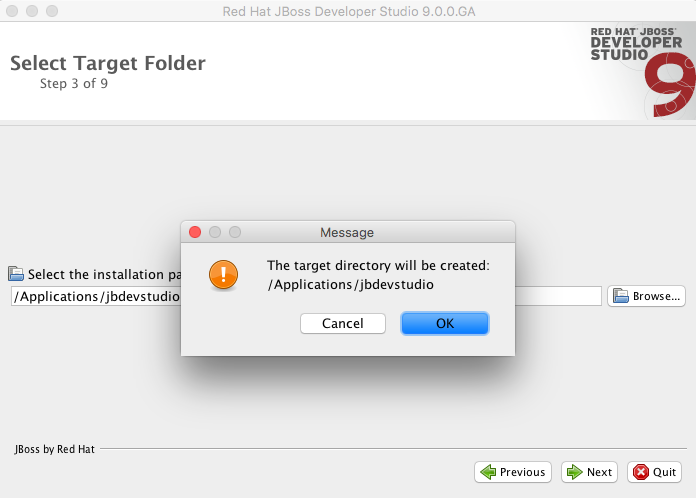
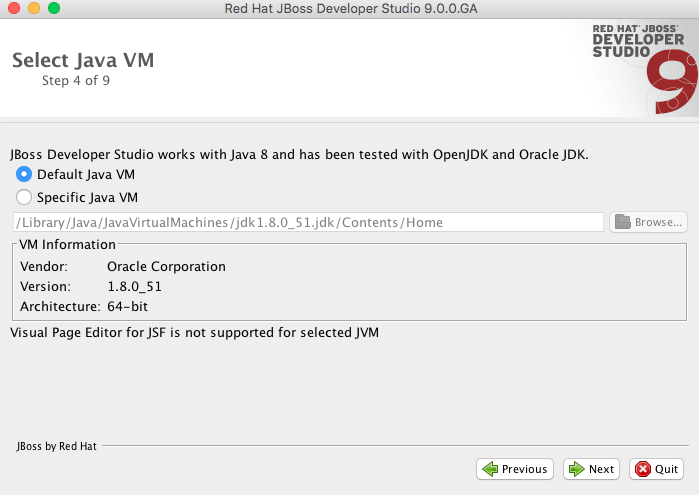
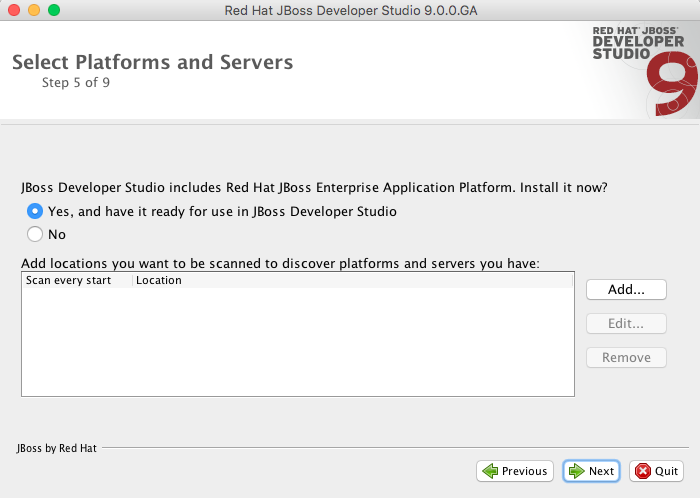
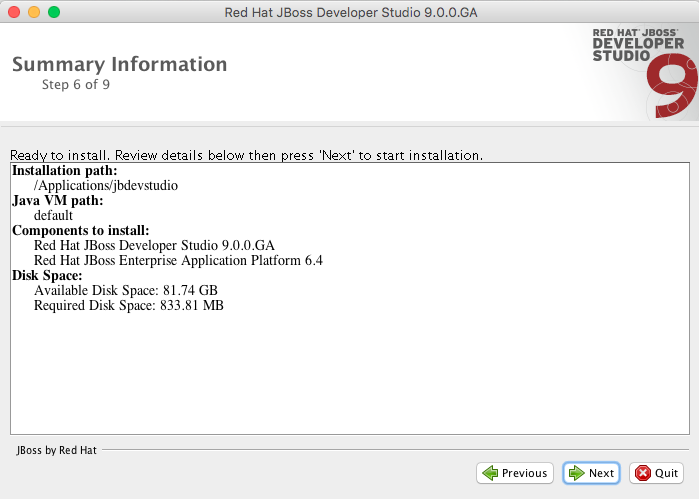
Installing JBDS 9.0 with EAP
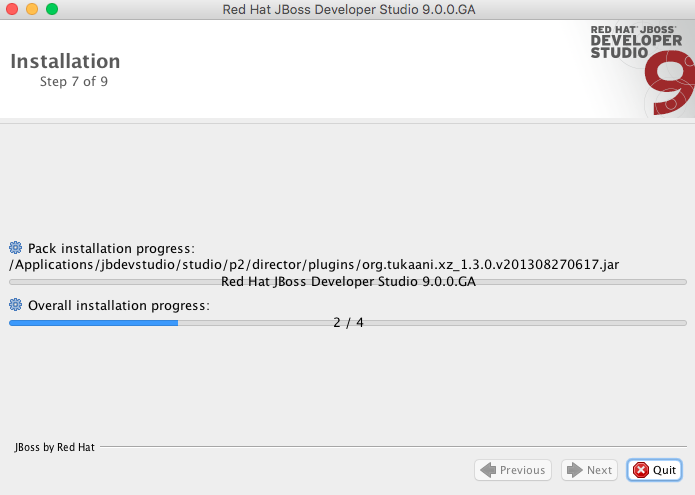
Installing JBDS is a piece of cake. Just download the installer from the JBoss website and in the target folder you enter:
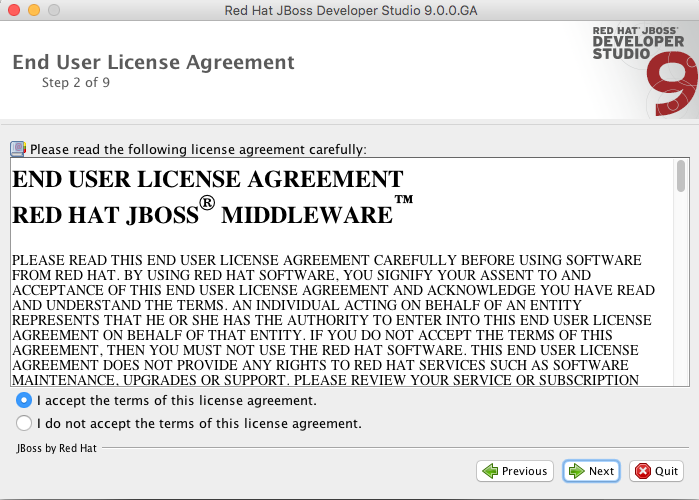
java -jar jboss-devstudio-<version>-installer-eap.jarThis will launch the installation process for your platform (Windows, Linux and OSX are supported). The wizard will take you through a number of consecutive steps that are illustrated using screenshots below.
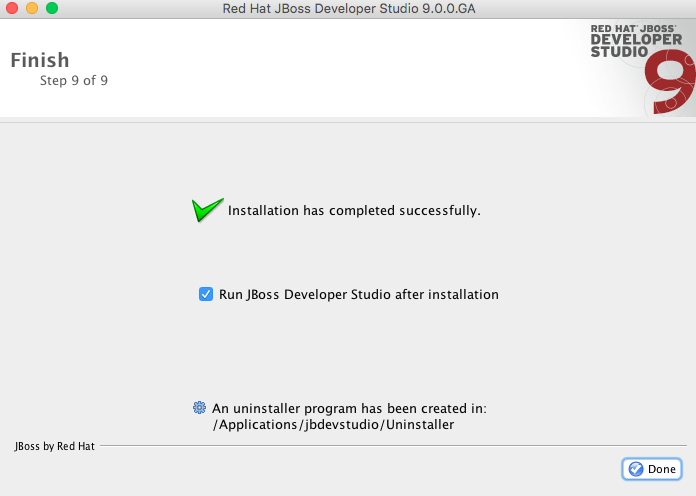
Congratulations! Now you are all set! Pressing Done will automatically launch JBDS.
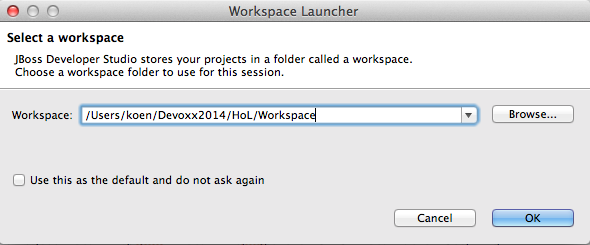
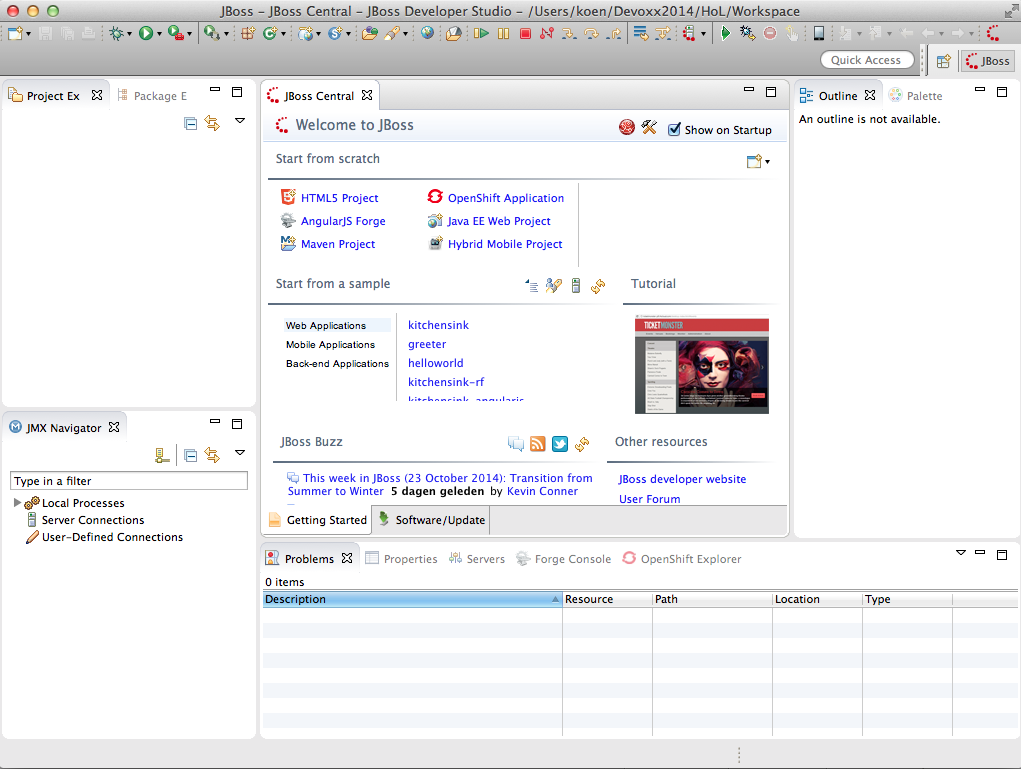
Choose an appropriate workspace and press OK to see JBDS in all its glory.
Using Forge
Forge can be used as a code generation engine, and can be accessed through multiple user interfaces (UIs) such as:
-
Command Line Interface (CLI)
-
JBoss Developer Studio (JBDS)
-
IntelliJ IDEA (not shown in this lab)
-
NetBeans (not shown in this lab)
-
Web (not shown in this lab)
In this section you will be getting used to Forge by performing small tasks, either with CLI, JBDS, or both. It is worth noting that JBoss Forge doesn’t introduce any special or proprietary dependencies in your code, it just generates a functional starting point and lets you continue as needed. This means you can switch from CLI, to JBDS, to your own IDE (unrelated to Forge) without getting in Forge’s way, and without Forge getting in the way of your IDE.
|
Note
|
In this section and the following sections, We will assume that you have already installed JBoss Forge. |
Let’s get started!
Creating a new project
Setting up a new project can involve quite a few activities. Typically, projects require a build and dependency management framework such as Maven, or Gradle. Even if you feel comfortable reading the respective configuration files, i.e. pom.xml or build.gradle, it takes some time to create them from scratch. What you usually do is consulting manuals or textbooks, look in internet or most often - copy and paste from one of your recent projects. Some of you may decide to use archetypes or IDE wizards, but you will soon realize that these generate too much garbage in your project configuration - garbage that you will usually delete.
CLI
The project-new command is what we will use to quick start a project :
$ project-new --named cdbookstore --stack JAVA_EE_7This will create an empty Maven project structure and a pom.xml file. The default groupId is org.cdbookstore, artifactId is cdbookstore and version number 1.0.0-SNAPSHOT. Also, the default project created is a web application, that’s why you can see a packaging of type war and maven-war-plugin defined. The stack command option will automatically install the JavaEE 7 dependencies in your pom.xml. If you want to change any of these options, just press TAB after a command and you will get all the command options:
$ project-new --named cdbookstore --top-level-package org.cdbookstore --target-location /directory/path --final-name cdbookstore --version 1.0.0.Final --stack JAVA_EE_7|
Important
|
You don’t need to specify any stack when creating a project, however choosing one will automatically add the necessary dependencies in your pom.xml and save you the trouble of choosing a specification version when configuring JPA, for example.
|
JBDS
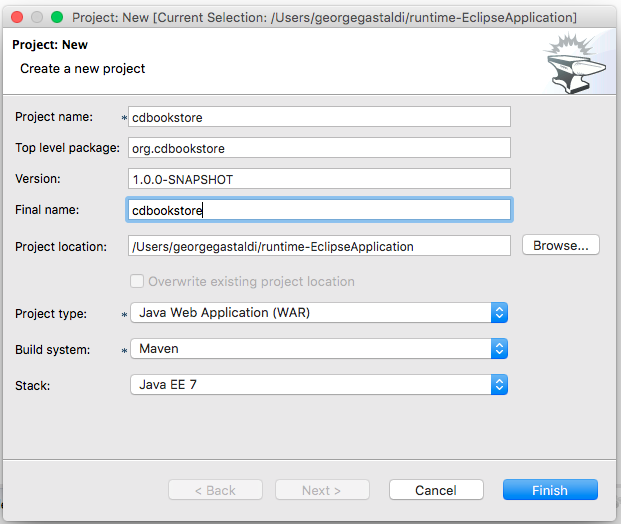
If you run Forge from JBDS, open the Forge wizard (Ctrl + 4 or CMD + 4 on Mac) then select Project: New and specify cdbookstore as project name, com.example as top level package, enter project location per your preference:
Setting up persistence and validation
Most of the Java EE applications need a relational database, map entities to it and do some sort of validation. Again, with JBoss Forge it is very easy to setup the persistence configuration, create an entity (or an embeddable), add fields to it and Bean Validation constraints.
CLI
To set up JPA and create a new JPA entity, let’s use the jpa-new-entity command :
[cdbookstore]$ jpa-new-entity --named BookThis command has several effects. First of all, it has created a persistence.xml file in the right place (under the META-INF directory) with all the default configuration for Hibernate. Then, it has created a Book entity under the subpackage model. Notice that this entity already has an id and version with its getters/setters. As you can see, the good thing with Forge is that with only one command all is setup and ready to go.
If you do not wish to use the Java EE container default data-source, you can also specify additional connection options such as JNDI data-source names, JDBC connection information, and data-source types. Note, however, that this means you will probably need to configure your application server to provide this new data-source and/or database connection.
[cdbookstore]$ jpa-setup --provider Eclipse\ Link --db-type POSTGRES --data-source-name java:comp/DefaultDataSourceIf you have executed the jpa-setup command, you’ve noticed that the prompt has changed: you went from [cdbookstore] to [persistence.xml]. In Forge, the prompt always tells you where you are. You can even enter the command pwd or ls. For now, let’s go back into the Book entity: enter cd~~ brings you to the root directory, and then cd src/main/java/org/cdbookstore/model/Book.java.
So, let’s create a few fields in the Book entity. Again, one single command and Forge will do its best to simplify our lives:
[Book.java]$ jpa-new-field --named titleThis creates an attribute called title of type String with get/set methods. Notice that Forge has also updated the toString method. Let’s add more commands with different options (remember to press TAB to get the options) :
[Book.java]$ jpa-new-field --named description --length 2000
[Book.java]$ jpa-new-field --named price --type java.lang.Float
[Book.java]$ jpa-new-field --named nbOfPages --type java.lang.Integer
[Book.java]$ jpa-new-field --named publicationDate --type java.util.Date --temporalType DATE
As you can see, Forge has a set of options to quickly create attributes and customize their JPA mappings. Now let’s say we want to specify that a book is written in a certain language. We can use Forge to quickly create a Java enum and then have it as a JPA Enumerated in the Book entity :
[Book.java]$ java-new-enum --named Language --target-package org.cdbookstore.model
[Language.java]$ java-add-enum-const --named ENGLISH FRENCH
This creates a Java enum, but notice the path on the left side : Forge CLI was set on the Book class (that’s why you could read [Book.java]$). When we created the enum, the path changed to [Language.java]$. Like any other shell script, Forge has a certain number of commands to navigate between directories, classes or files (you will find the full list of commands in the Appendix). So, to go back to the Book entity we just use the cd command :
[Language.java]$ cd ..
[model]$ cd Book.java
[Book.java]$
Now that we are in the Book entity, we can create a new enum field with the following command :
[Book.java]$ jpa-new-field --named language --type org.cdbookstore.model.LanguageBy default, a JPA field is of type String. With the --type option we can choose from basic datatypes (int, byte, char…), enum, or from other entities and entity cardinality (One-to-One, One-to-Many, Many-to-One, Many-to-Many). So let’s create a new Author entity, and add a Many-to-One relationship with Book :
[Book.java]$ jpa-new-entity --named Author
[Author.java]$ jpa-new-field --named firstName
[Author.java]$ cd ../Book.java
[Book.java]$ jpa-new-field --named author --type org.cdbookstore.model.Author --relationship-type Many-to-One
Forge takes care of all the JPA relational mapping between both entities. Now, on an entity, we can add Bean Validation constraints on properties with the constraint-add command.
[Book.java]$ constraint-add --constraint NotNull --on-property title
[Book.java]$ constraint-add --constraint Past --on-property publicationDate
[Book.java]$ constraint-add --on-property description --constraint Size --max 3000
Behind the scenes Forge has created a validation.xml file, added the Bean Validation dependency and the needed constraints. If you want to take a glance at the code, and see a summary of progress, you can use the more command or even ls your class :
[Book.java]$ ls

[fields]
author::org.cdbookstore.model.Author      language::org.cdbookstore.model.Language  publicationDate::java.lang.String
description::java.lang.String             nbOfPages::java.lang.Integer              title::java.lang.String
id::java.lang.Long                        price::java.lang.Float                    version::int

[methods]
equals(java.lang.Object)::boolean                  getPublicationDate()::java.lang.String             setLanguage(org.cdbookstore.model.Language)::void
getAuthor()::org.cdbookstore.model.Author          getTitle()::java.lang.String                       setNbOfPages(java.lang.Integer)::void
getDescription()::java.lang.String                 getVersion()::int                                  setPrice(java.lang.Float)::void
getId()::java.lang.Long                            hashCode()::int                                    setPublicationDate(java.lang.String)::void
getLanguage()::org.cdbookstore.model.Language      setAuthor(org.cdbookstore.model.Author)::void      setTitle(java.lang.String)::void
getNbOfPages()::java.lang.Integer                  setDescription(java.lang.String)::void             setVersion(int)::void
getPrice()::java.lang.Float                        setId(java.lang.Long)::void                        toString()::java.lang.String
JBoss Developer Studio (JBDS)
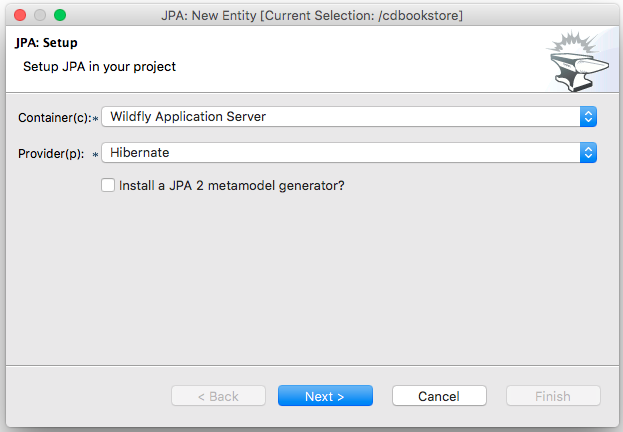
While working from JBoss Developer Studio (JBDS), after opening the Forge wizard (Ctrl + 4 or CMD + 4 on Mac), you should choose JPA: New Entity and you’ll see a JPA configuration window. This window provides default values for the Java EE container default data-source, but if you not do wish to use it, you can change your configuration as specified before with CLI.
In the first step you need to setup JPA in your project:
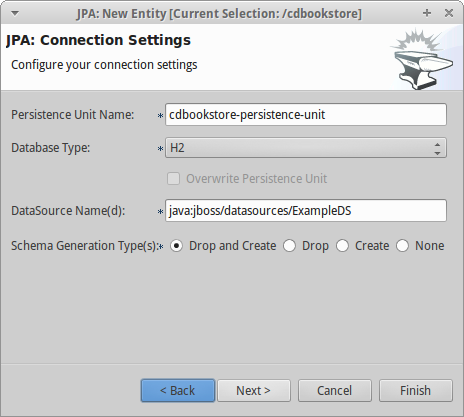
The next step you need to configure your connection settings:
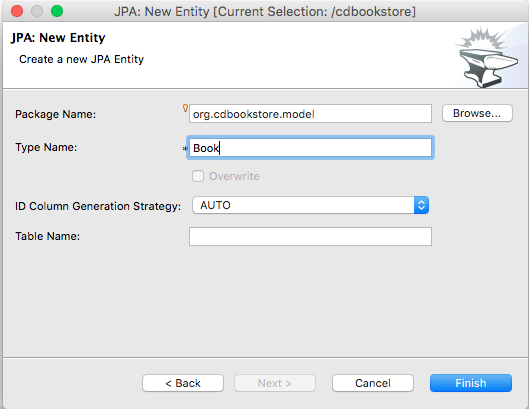
After the configuration step, you can create your first entity.
Enter Book as Entity name, org.cdbookstore.model in Target package and click Finish.
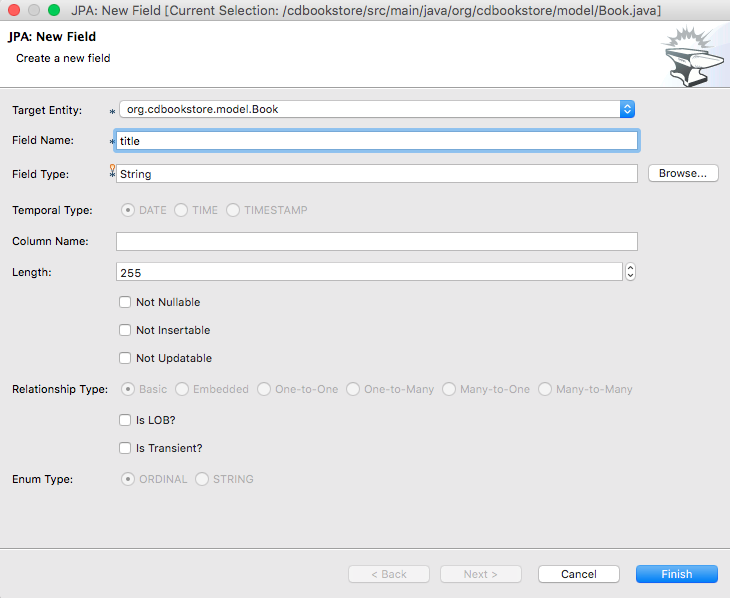
Then you need add fields to your Entity. After opening the Forge wizard (Ctrl + 4 or CMD + 4 on Mac), you should choose JPA: New Field and select the Book as Target entity, title as Field Name, String as Type and click Finish:
Repeat these steps to create the following fields in the Book class:
Field name: description | Type: java.lang.String| Length: 2000
Field name: price | Type: java.lang.Float
Field name: nbOfPages | Type: java.lang.Integer
Field name: publicationDate | Type java.util.Date | Temporal Type: DATE
Now you need to specify that a book is written in a certain language. We’ll create a Java enum and then have it as a JPA Enumerated in the Book entity. After opening the Forge wizard (Ctrl + 4 or CMD + 4 on Mac), you should choose Java: New Enum and enter org.cdbookstore.model in Package name and Language in Type Name:

Now you need to add new constants to it. After opening the Forge wizard (Ctrl + 4 or CMD + 4 on Mac) you should choose Java: New Enum Const and add all constants, in this case:
ENGLISH
FRENCH
and click Finish:

Now, you need add this enum as a field in Book. After opening the Forge wizard (Ctrl + 4 or CMD + 4 on Mac) you should choose JPA: New Field and select the Book as Target Entity, enter language as Field name and select org.cdbookstore.model.Language as Field Type:

Now you need to create a new Entity (Same that you did with Book):
Entity Name: Authorand create a new field to it (Same that you did in Book):
Field Name: firstName | Type: StringNow you need to add a Many-to-One relationship with Book.
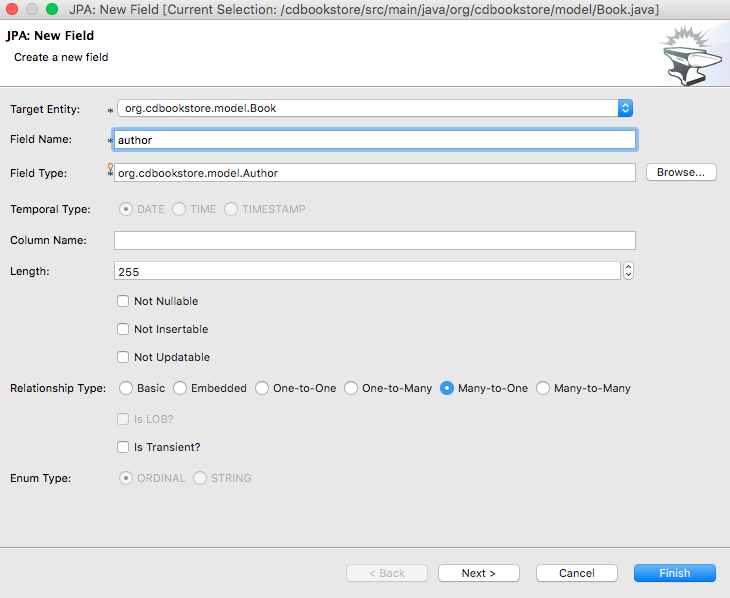
Open the Forge wizard (Ctrl + 4 or CMD + 4 on Mac) and choose JPA: New Field, select the Book as Target Entity. Enter author as Field name, select org.cdbookstore.model.Author as Field Type and mark Many-to-One as Relationship Type and click Finish (or Next):
If you choose Next instead of Finish, You can configure your relationship:
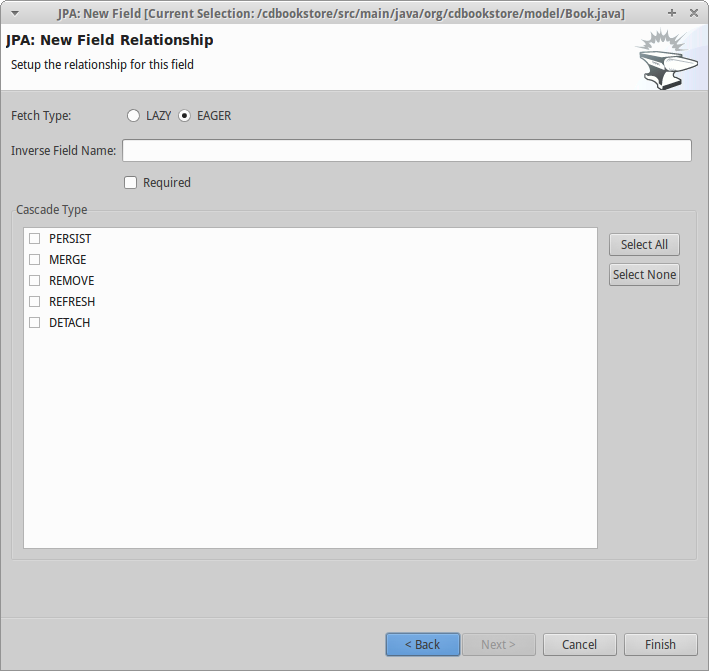
Forge takes care of all the JPA relational mapping between both entities.
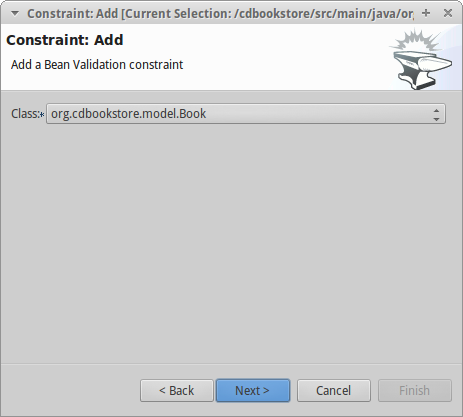
Now, on an entity, we can add Bean Validation constraints. Open the Forge wizard (Ctrl + 4 or CMD + 4 on Mac) and choose Constrait: Add. You’ll see a configuration window, just like first step of the JPA: New Entity that you executed before:
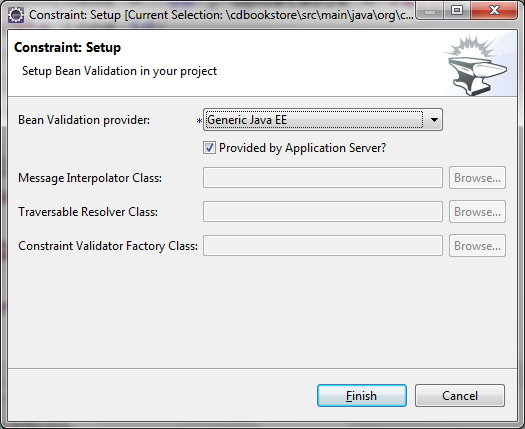
You should choose the Generic Java EE as Bean Validation provider and check "Provided by Application Server?". If you don’t want the default configuration provided by Application Server you are free to change your configurations. Click Next, and choose org.cdbookstore.model.Book as Class:
In the next step you need to specify the property Property and the Constraint to configure. In this case, let’s add @NotNull on the title property:
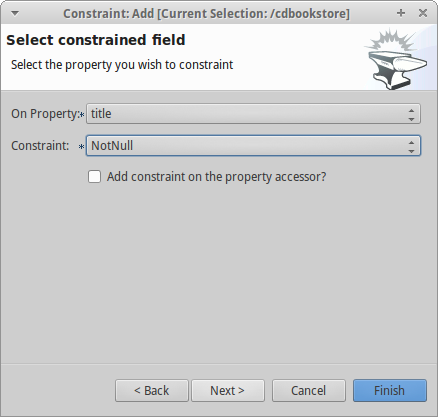
Once the constraint is selected, you can also specify if you want the constraint to appear on the property itself, or on the property accessor (getter method).
Click Next to configure payload, groups and message:

Click Finish.
Now add two more constraints to the Book class:
Property: publicationDate | Constraint: Past
Property: description | Constraint: Size | Max: 3000
Scaffolding JSF (Java Server Faces)
JSF is the default Java EE user interface framework, and consequently JBoss Forge has a great support for it. In fact, Forge can scaffold an entire CRUD web application from JPA entities very easily, with only a single command. The JSF generated application follows several patterns and best practices: usage of CDI conversation scope, the extended persistence context, JSF converters and so on. If you don’t believe it, just try it.
CLI
Now that we have created fields in the entities, it’s time to scaffold web pages for these entities. We can either scaffold per entity, or use a wildcard to let Forge know it can generate a UI for each entity
[model]$ scaffold-generate --provider Faces --targets org.cdbookstore.model.*This has the same effect of scaffolding per entity :
[model]$ scaffold-generate --provider Faces --targets org.cdbookstore.model.Book
[model]$ scaffold-generate --provider Faces --targets org.cdbookstore.model.Author
In a single command Forge has generated configurations files (web.xml, faces-config.xml, …), JSF pages for both Book and Author, images, CSS and added Bootstrap for the layout.
By default Forge scaffolds a web application with JSF 2.0 but you can change this configuration by executing the faces-setup command. In fact, most of the Forge commands can be setup (e.g. jpa-setup, servlet-setup…)
$ faces-setupJBDS
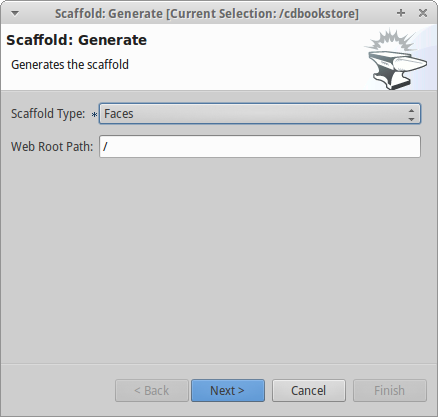
In JBDS it’s simple too. After opening the Forge wizard (Ctrl + 4 or CMD + 4 on Mac) you should choose Scaffold: Generate, choose Faces as Scaffold Type:
If you haven’t selected the Java EE 7 stack when creating the project, click Next to configure the Faces Scaffold:
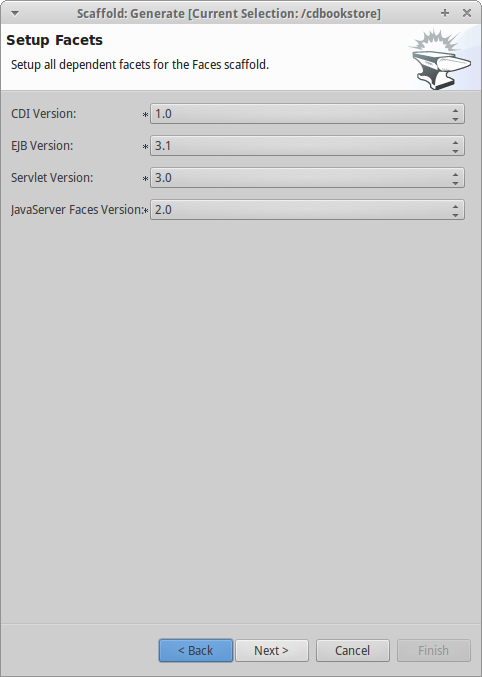
By default Forge scaffolds set suggested values for Java EE specification versions, but you can change this configuration as well.
Click Next to continue to select entities for which you want to generate scaffolding. In this case we’ll generate for all entities:
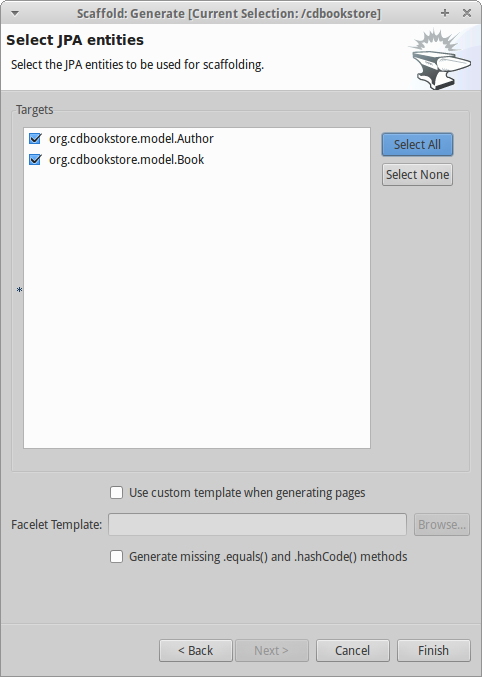
Click Finish and JBoss Forge will create your user interface.
Scaffolding REST Endpoints
REST is a very popular technology nowadays. If you want to create REST endpoints on our entities, or if you want to add a REST endpoint on your existing Java EE web application, Forge is there to help. Forge can quickly scaffold REST endpoints for each entity, giving you a set of CRUD methods. And again, generating all the code plumbing and following best practices.
CLI
Now that we have a few entities (Book and Author), it’s time to generate REST endpoints. Like for JSF, it is just a matter of executing one single command:
[model]$ rest-generate-endpoints-from-entities --targets org.cdbookstore.model.*This is the easiest command to generate the REST endpoints, but like most Forge commands, you can customize a few options if you want, such as package name and so on.
While "holding" most files as the current resource, you may inspect them using ls. This also works on REST endpoints. So, if you cd BookEndpoint.java (if you have not selected it already) and execute the command ls, this is what you get :
[model]$ cd ../rest/BookEndpoint.java
[BookEndpoint.java]$ ls

[fields]
em::javax.persistence.EntityManager

[methods]
create(org.cdbookstore.model.Book)::javax.ws.rs.core.Response  findById(java.lang.Long)::javax.ws.rs.core.Response            update(org.cdbookstore.model.Book)::javax.ws.rs.core.Response
deleteById(java.lang.Long)::javax.ws.rs.core.Response          listAll(java.lang.Integer,java.lang.Integer)::java.util.List
JBDS
Open the Forge wizard (Ctrl + 4 or CMD + 4 on Mac) and choose REST: Generate Endpoints from Entities, the first step, you need to configure the REST in your application, enter all information such as:
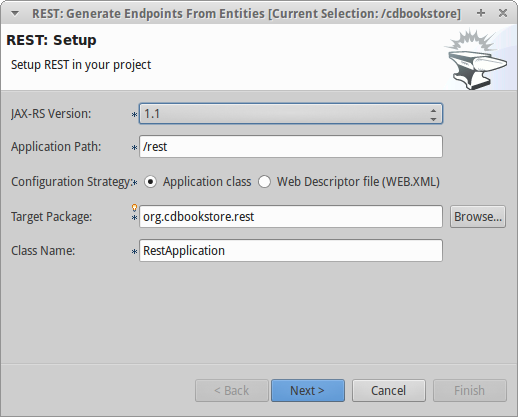
Click next to select the entities for which endpoints should be generated, select all, and click Finish (or click Next for more options):
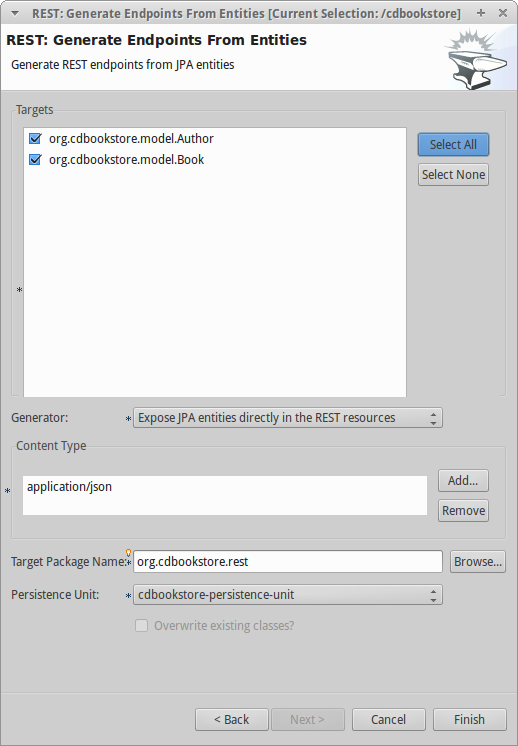
You can customize some options if you prefer, such as Configuration Strategy, Class Name, Content Type and so on.
Deploying on WildFly
Does the WildFly application server need much of an introduction? WildFly? Quickly then. WildFly is a flexible, lightweight, managed application runtime that helps you build amazing applications… and we are going to need it to deploy our web application and REST endpoints. For that, we have several options : download it, install, execute and deploy our web application, or use a JBoss Forge addon. Let’s try that.
Installing the JBoss AS Forge addon
The beauty of JBoss Forge is that it’s extensible. In fact, Forge is a add-on container (called Furnace) and everything is seen as an extension (as a matter of fact, the CLI itself is an add-on!). To see the list of add-ons, visit the Forge documentation(http://forge.jboss.org/addons). And if you want to see all the already installed add-ons, execute the following command :
[cdbookstore]$ addon-list
Currently installed addons:
org.jboss.forge.addon:addon-manager,2.12.2-SNAPSHOT
org.jboss.forge.addon:addon-manager-spi,2.12.2-SNAPSHOT
org.jboss.forge.addon:addons,2.12.2-SNAPSHOT
org.jboss.forge.addon:bean-validation,2.12.2-SNAPSHOT
org.jboss.forge.addon:configuration,2.12.2-SNAPSHOT
...
etc
...
Enough, talking, let’s install the WildFly add-on. For that, in the Forge console just type the following commands (and wait for Maven to download the Internet) :
[cdbookstore]$ addon-install-from-git --url https://github.com/forge/as-addon  --coordinate org.jboss.forge.addon:as
[cdbookstore]$ addon-install-from-git --url https://github.com/forge/jboss-as-addon  --coordinate org.jboss.forge.addon:jboss-as-wf
Now that you installed these new add-on, you get new as-setup command :
[cdbookstore]$ as-setup --server wildfly --version 8.1.0.FinalWait a bit until WildFly is downloaded…. (in the meantime you can go to ~/.forge/addons and have a look at what’s happening… you can even check the logs under ~/.forge/log/forge.log)… ok, now that Wildfly is downloaded into your local Maven directory… there it is…. just type as, press TAB and you will see new commands :
[cdbookstore]$ as-
as-deploy  as-setup  as-shutdown  as-start  as-undeploy
So let’s build the application, start JBoss with as-start and deploy our application with as-deploy :
[cdbookstore]$ build
[cdbookstore]$ as-start
(...)
JBoss logs
(...)
[cdbookstore]$ as-deploy
WildFly is started, the application is deployed, you can now go to http://localhost:8080/cdbookstore and create new books and authors.
Installing the JBoss AS Forge addon on JBDS
Open the Forge wizard (Ctrl + 4 or CMD + 4 on Mac) and choose Install an Addon from GIT, enter https://github.com/forge/jboss-addon as GIT Repository URL and org.jboss.forge.addon:as as Coordinate:
GIT Repository|Coordinate
https://github.com/forge/as-addon | org.jboss.forge.addon:as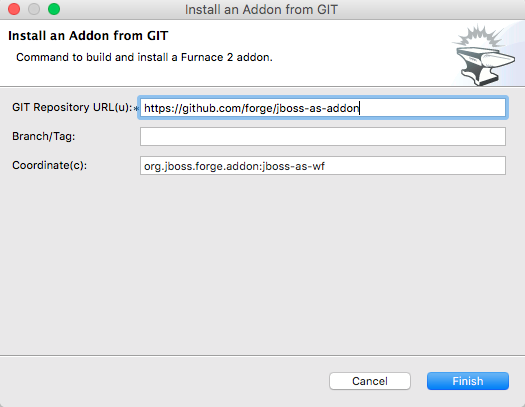
Open the Forge wizard again (Ctrl + 4 or CMD + 4 on Mac) and choose Install an Addon from GIT, enter https://github.com/forge/jboss-as-addon as GIT Repository URL and org.jboss.forge.addon:jboss-as-wf as Coordinate:
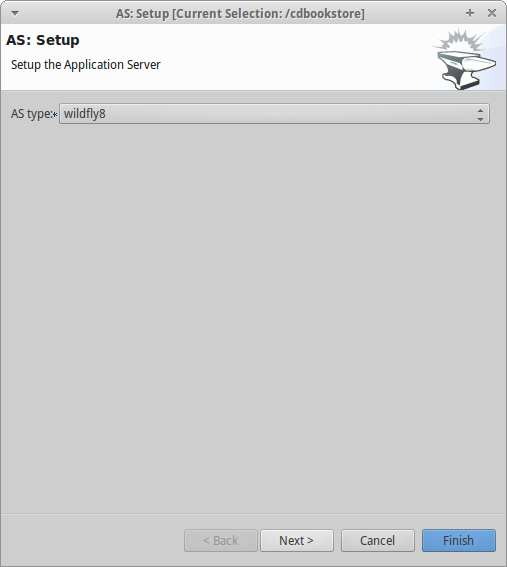
GIT Repository: https://github.com/forge/jboss-as-addon | Coordinate: org.jboss.forge.addon:jboss-as-wfIt’s now time to set up your server. Open the Forge wizard (Ctrl + 4 or CMD + 4 on Mac) and choose AS: Setup, then select wildfly8:
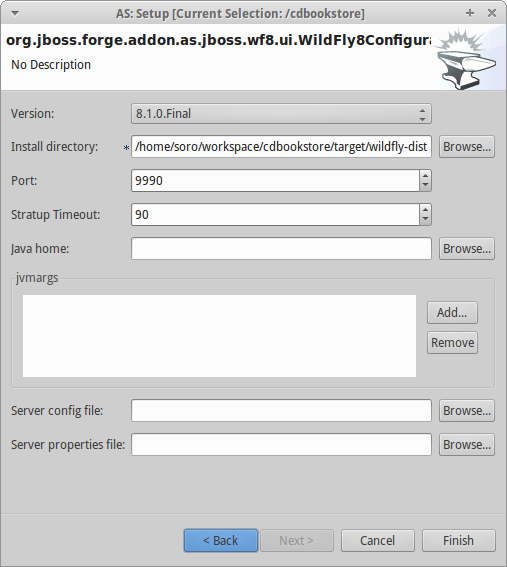
Click next to configure the Install directory, Port and so on:
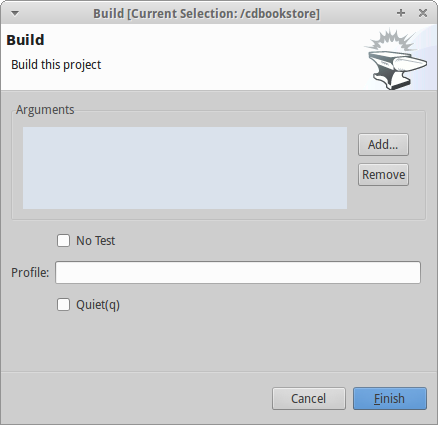
Now let’s build the application:
Open the Forge wizard (Ctrl + 4 or CMD + 4 on Mac) and choose Build:
Now start server with the AS: Start command and deploy application with AS: Deploy:
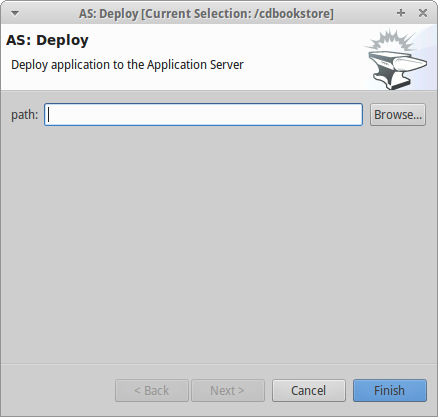
Click Finish, and your application will be deployed on WildFly.
Creating Arquillian tests
Arquillian is an innovative and highly extensible testing platform for the JVM that enables developers to easily create automated integration, functional and acceptance tests for Java middleware. Picking up where unit tests leave off, Arquillian handles all the plumbing of container management, deployment and framework initialization so you can focus on the task at hand, writing your tests. Real tests. In short…
Arquillian brings the test to the runtime so you don’t have to manage the runtime from the test (or the build). Arquillian eliminates this burden by covering all aspects of test execution, which entails:
-
Managing the lifecycle of the container (or containers)
-
Bundling the test case, dependent classes and resources into a ShrinkWrap archive (or archives)
-
Deploying the archive (or archives) to the container (or containers)
-
Enriching the test case by providing dependency injection and other declarative services
-
Executing the tests inside (or against) the container
-
Capturing the results and returning them to the test runner for reporting
To avoid introducing unnecessary complexity into the developer’s build environment, Arquillian integrates seamlessly with familiar testing frameworks (e.g., JUnit 4, TestNG 5), allowing tests to be launched using existing IDE, Ant and Maven test plugins — without any add-ons.
Installing the Arquillian Forge addon
Like the WildFly add-on we just installed and used, bringing Arquillian capabilities to Forge is just a matter of installing one add-on. The easiest installation method is to install directly from a Git repository by executing the following command in the Forge console:
[cdbookstore]$ addon-install-from-git --url https://github.com/forge/addon-arquillian.git --coordinate org.arquillian.forge:arquillian-addonTo make sure the add-on is properly installed, enter arq and press TAB, you should see the command arquillian-setup. Now, let’s use it.
|
Note
|
Don’t forget to have a look at the available add-ons on http://forge.jboss.org/addons |
CLI
The first thing to do is to setup Arquillian for WildFly by executing the following command:
[cdbookstore]$ arquillian-setup --arquillian-version 1.1.10.Final --test-framework junit --test-framework-version 4.11 --container-adapter wildfly-remote --container-adapter-version 8.2.1.FinalThis command adds all the needed dependencies in our pom.xml (JUnit, Arquillian core, Arquillian extension for WildFly) and Maven Profile (arquillian-wildfly-remote) to run the Arquillian tests. This command has also created an arquillian.xml file where all the Arquillian configuration goes. As you can see, with a single command, JBoss Forge has dealt with all the plumbing configuration.
To create an Arquillian tests, it is as easy: we use the arquillian-create-test command and target a specific bean. For example, in our example we can create a test for the BookBean as follow:
[cdbookstore]$ arquillian-create-test --targets org.cdbookstore.view.BookBeanThis creates the BookBeanTest under src/test/java. The way to run this test is first, make sure WildFly is up and running, second, open a command prompt (outside Forge) and run Maven using the right profile:
mvn install -Parquillian-wildfly-remote|
Note
|
the build command has a known bug that prevents running the test specifying a profile name.
|
The test might not work and you should look at the stack trace on the server side. If you get any java.lang.ClassNotFoundException (example org.cdbookstore.model.Book) that’s because you need to fix the Shrinkwrap packaging by adding the missing class. And if the persistent unit is unknown, you need to package it explicitly under the META-INF directory. For example, in the code below, Shrinkwrap wraps the BookBean and its dependent classes into a single deployment:
   @Deployment
   public static JavaArchive createDeployment()
   {
      return ShrinkWrap.create(JavaArchive.class)
            .addClasses(Book.class, Language.class, Author.class)
            .addClass(BookBean.class)
            .addAsManifestResource("META-INF/persistence.xml", "persistence.xml")
            .addAsManifestResource(EmptyAsset.INSTANCE, "beans.xml");
   }
The test should be green. Isn’t it?
Again, with a few Forge commands you manage to setup Arquillian, generate a test and execute it. You have no more excuse for not testing.
Keep on playing
Here we just show you a subset of the JBoss Forge features, but don’t hesitate to keep on playing with other commands (full list in appendix). Now that you feel confortable with Forge, let’s jump to the next section.
Developing Forge
Now that you’ve installed JBoss Forge, played with it a bit (either with CLI or JBDS), it’s time to quickly develop a real web application and extend it by adding Hibernate Envers. In this section you will execute a JBoss Forge script and learn how to develop add-ons.
Developing a Java EE 7 web application in few seconds
As you’ve seen in the previous section, with Forge you can enter a few commands, and you’ll get code generated. With scaffolding you can even quickly generate a set of JSF pages and REST endpoints to have CRUD capabilities. So, even if you type on your keyboard very quickly, how would you be able to develop an entire Java EE 7 web application in a few seconds? The answer is simple: by running a Forge script!
A forge script is just a file that contains a set of commands. The commands below create a new Country entity with a set of fields. As you can see we can even have comments that start with the # symbol. You can end your lines with a ; but you don’t have to :
#  Country entity
#  ############
jpa-new-entity --named Country ;
jpa-new-field --named isoCode --length 2 --column-name iso_code --not-nullable ;
jpa-new-field --named name --length 80 --not-nullable ;
jpa-new-field --named printableName --length 80 --column-name printable_name --not-nullable ;
jpa-new-field --named iso3 --length 3 ;
jpa-new-field --named numcode --length 3 ;
If you save these commands into a file called country.fsh then, you just have to execute with :
[cdbookstore]$ run country.fshYou will see Forge executing line by line each command in a few seconds. So what about running a bigger script?
The famous Java Petstore is back
The good thing about the Java Petstore is that we don’t have to explain it much: most of us have heard about it. Haven’t You?
The Java Petstore was a sample application created by Sun for its Java BluePrints program. The Java Petstore was designed to illustrate how J2EE (and then Java EE) could be used to develop an eCommerce web application. Yes, the point of the Petstore is to sell pets online. The Petstore had a huge momentum and we started to see plenty of Petstore-like applications flourish. The idea was to build an application with a certain technology. Let’s face it, the J2EE version was far too complex using plenty of (today outdated) design patterns.
With a single Forge script, you will generate a CRUD application that will let you manage the Pet’s back-end catalog.
Executing the script
First of all, download the script from https://github.com/forge/docs/blob/master/tutorials/forge-hol/scripts/generate.fsh. You can have a look into it. As you can see, the script:
-
creates and sets up the project (a Java EE 7 one)
-
creates the domain model with entities, embeddables, constraints and enums. Most of the entities have relationships (One-to-One, Many-to-One…) with others
-
creates utility classes, exceptions, CDI qualifiers, interceptors
-
adds a service layer with EJBs
-
scaffolds JSF pages and creates new JSF beans
-
generates REST endpoints
-
cleans the
pom.xmlto get rid of some dependencies and add new ones
Now execute the script with :
[temps]$ run generate.fshDepending on the location of the script file, you can also run :
[temps]$ run ../../code/script/generate.fshYou will see hundreds of lines of code scrolling. Once the project is successfully created, have a look at the thousands of lines of code (Java, XML, HTML, CSS…) that Forge generated. The only missing feature today in Forge is the ability to generate methods. That’s why some classes are just empty (e.g. the service tier). But adding method is in the roadmap.
And the best of all, is that it works! To build the application, just do it in Forge :
[petstore]$ buildRunning the application
Before deploying the application on WildFly you can grab the SQL script https://github.com/forge/docs/blob/master/tutorials/forge-hol/scripts/import.sql and copy it to petstore/src/main/resources. This will add data to the database.
Then, just deploy the war file into WildFly, go to the URL http://localhost:8080/petstore and you should see the following homepage :
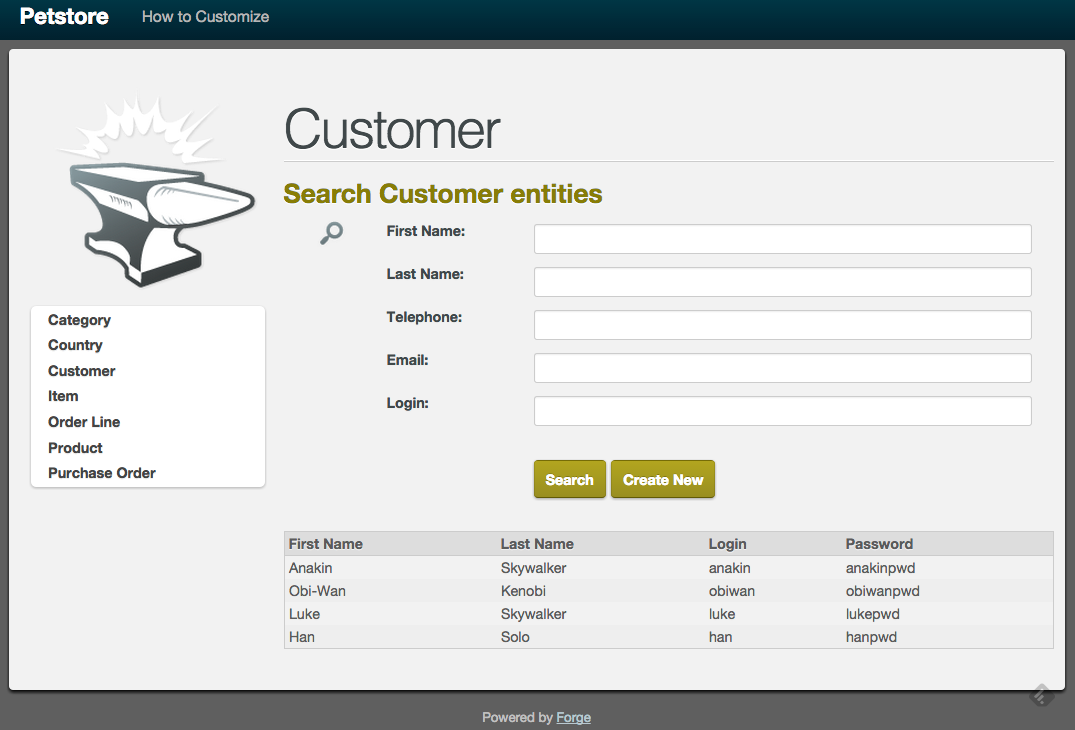
Do not hesitate to browse the database content, create new items, remove customers, filter addresses, update categories… JBoss Forge has just created an entire CRUD web application for our domain model dealing with all the many-to-one, one-to-one… relationships.
Also check the REST interfaces. You can use any REST client (such as Postman for example) to GET/POST/PUT/DELETE data to the database. Go to the following URLs to get a peek at the REST data:
Looking at the generated code
Now that you’ve seen it running, it’s time to take a break, fill up a cup of coffee and have a look at the code. This is what you will find in the following packages :
-
constraints: Bean validation constraints. -
exceptions: Application exceptions. -
model: The entities, embeddables, enums. -
rest: The REST endpoint doing GET/POST/PUT/DELETE operations. Also check theRestApplicationclass. -
security: Classes for security matter -
service: EJB layer -
util: Some CDi qualifiers, interceptors, producers -
view: JSF backing beans using CDI conversation, extended persistence context -
webapp: JSF pages, Bootstrap 2, templates, css files, images
|
Note
|
Some of the classes that you’ve seen are empty or not totally implemented. When you go back home and have time to dig this topic, you can check the final application at https://github.com/agoncal/agoncal-application-petstore-ee7 |
Now that you have a real application up and running, let’s use JBoss Forge to extend it by developping a few add-ons and applying them to the Petstore application.
Developing Hibernate Envers addon
Hibernate Envers is a Hibernate core module that enables auditing of persistence classes.
If you want to audit the history of all the changes made to a certain entity or one of its fields during the web
application runtime, you just need to audit that with @Audited. Envers will create a separate table for each such
entity, which will hold the changes made to it.
In this section we will develop a Forge addon with the following features:
-
Setup Hibernate Envers for a project by adding required dependencies to the POM
-
Enable auditing an entity by adding the
@Auditedannotation on class level
Creating a new Forge addon
Creating a new Forge addon is similar to creating any new project. You can do it manually, copying
and modifying an existing project of the same type, or you can use a Forge wizard to do it for you. We would certainly recommend using Forge to help you bootstrap everything for several reasons. It knows exactly which dependencies and artifacts you need as a starting point, so you will not miss anything. Forge will also not create any garbage in your new project.
Before creating the Envers addon, you need to start Forge. Before you continue, please make sure that you have followed the instructions in the Section: [installing-forge]. You can create a new addon if you run the following command in the Forge CLI:
$ project-new --named envers --type forge-addon --top-level-package org.jboss.forge.addonIf you run Forge from JBDS, open the Forge wizard (Ctrl + 4 or CMD + 4 on Mac) then select Project: New and specify envers as project name, org.jboss.forge.addon as top level package, enter project location per your preference and as a Project type select Forge Addon:
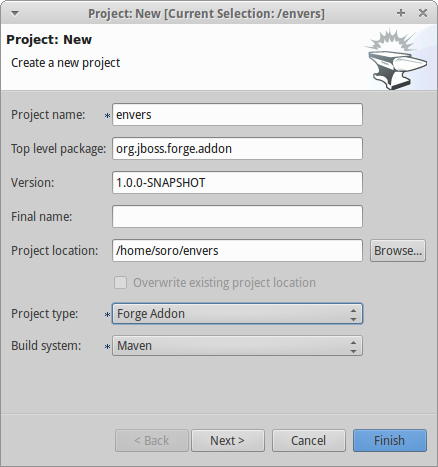
This will create a skeleton Maven project that has the following artifacts:
-
pom.xmlwhere the top level package is the group ID and the project name is the artifact ID. Besides the minimum Forge dependencies, the command will add also dependencies on any addons that you chose by using the--addonsoption. Addons specified in this way must use the following format: <group-id>:<artifact-id>,<version> -
Standard maven directory structure plus the top level package
-
Empty
beans.xmlin thesrc/main/resources/META-INFdirectory. This is because Forge and its addons strongly rely on the CDI development model -
README.asciidocfile with a standard skeleton for documenting Forge addons (You should take a few moments to read over this file and fill in the blanks with information about your new addon.)
Developing the "Envers: Setup" command
The first command that we are going to create will set up Envers for a project. This basically means that the command will add the Envers library dependency to the current project POM (but will not actually directly edit the file, because Forge supports multiple build systems!). As with the new Forge addon, we can manually write the command class, copy and modify an existing command or let Forge itself generated it for us. Here we will go for the third option.
If you are running from the command line interface, type in:
[envers]$ addon-new-ui-command --named EnversSetupCommand --command-name "Envers: Setup" --categories "Auditing"In JBDS, open the Forge wizard (Ctrl + 4 or CMD + 4 on Mac), then choose Addon: New UI Command
and enter EnversSetupCommand in the Type Name field, Envers: Setup in the Command Name field and add Auditing to the Categories list box:
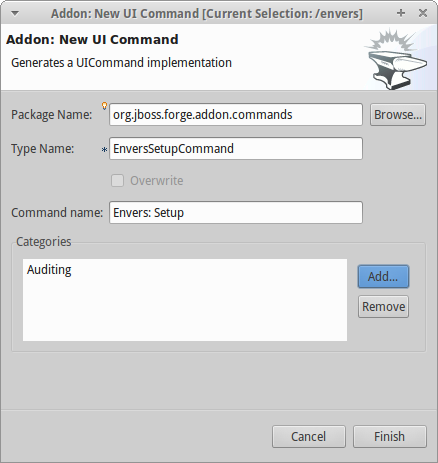
This will generate the EnversSetupCommand class in the org.jboss.forge.addon.commands package (unless you specify a different package). Forge makes this new command class extend AbstractUICommand, which provides some basic functionality like configuring the command name, the command dialog and the command execution. We will go through these in this and the next few sections.
The getMetadata() method is where basic information about your command is defined, and should be already implemented by Forge (using the values you specified in the New UI Command wizard):
   @Override
   public UICommandMetadata getMetadata(UIContext context)
   {
      return Metadata.forCommand(EnversSetupCommand.class).name(
            "Envers: Setup").category(Categories.create("Auditing"));
   }
This will basically create a command that can be called envers-setup from the CLI (note the substitution of colons and spaces by hyphens) and as Envers: Setup in the Auditing category in the Forge wizard
As the newly created command will not require any input from the user, we will leave the initializeUI method empty. However, in order to implement the command execution behavior, we will need to change a little bit our class. More precisely we will have to extend from another abstract command class. The rationale behind this is that we want to update the current project POM, so extending org.jboss.forge.addon.projects.ui.AbstractProjectCommand instead of AbstractUICommand will give us some handy methods to access and manipulate the Project itself:
public class EnversSetupCommand extends AbstractProjectCommand
{
We now have to implement two more abstract methods coming from this parent class. Take a moment to review the JavaDoc for these new methods, and understand their behavior. If you are confused, ask for help!:
   @Override
   protected boolean isProjectRequired()
   {
      return true;
   }

   @Inject
   private ProjectFactory projectFactory;

   @Override
   protected ProjectFactory getProjectFactory()
   {
       return projectFactory;
   }
The org.jboss.forge.addon.projects.ProjectFactory interface is used to create new or obtain references to existing project.
+
After having specified Envers: Setup as a "project command", we can now proceed to implementing the execute method. Usually this is called when the user clicks Finish on the command dialog or in our case, when the command has no inputs, and will be executed as soon as it is selected from the Forge quick start menu.
+
As we mentioned earlier, the command needs to add the Hibernate Envers dependency to the project. So first, let’s create a representation of this dependency using the org.jboss.forge.addon.dependencies.builder.DependencyBuilder utility class:
   @Override
   public Result execute(UIExecutionContext context) throws Exception
   {
      Dependency dependency =
            DependencyBuilder.create("org.hibernate")
                             .setArtifactId("hibernate-envers")
                             .setVersion("4.3.6.Final")
                             .setScopeType("provided");
   }
Speaking in Maven terms, this is a dependency on an artifact with ID hibernate-envers, coming from the org.hibernate group, having version 4.3.6.Final and going into the project’s provided scope.
After we have specified our dependency, we will have to add it to the project model. For that purpose we will use the org.jboss.forge.addon.projects.dependencies.DependencyInstaller utility, responsible for installing a given dependency into the project :
   @Inject
   private DependencyInstaller dependencyInstaller;
Forge 2.0 is based on modular runtime called Furnace. The core of Furnace itself is not bound to any development model, so addons can decide which of the Furnace container implementations it wants to use. We created our addon with the default configuration which enables the CDI container and development model. That is why we were able to use @Inject in the code snippet above. Forge will provide us with the dependency installer service, which we can use to add dependencies to selected Project when our command is executed.+
Now it is time to install our dependency:
   @Override
   public Result execute(UIExecutionContext context) throws Exception
   {
      Dependency dependency =
            DependencyBuilder.create("org.hibernate")
                             .setArtifactId("hibernate-envers")
                             .setVersion("4.3.6.Final")
                             .setScopeType("provided");
      dependencyInstaller.install(getSelectedProject(context), dependency);

   }
We are using here one of the helper methods provided by the AbstractProjectCommand: getSelectedProject().
Now our job is done, so it is time to report what we did. We do it by returning the result:
   @Override
   public Result execute(UIExecutionContext context) throws Exception
   {
      Dependency dependency =
            DependencyBuilder.create("org.hibernate")
                             .setArtifactId("hibernate-envers")
                             .setVersion("4.3.6.Final")
                             .setScopeType("provided");
      dependencyInstaller.install(getSelectedProject(context), dependency);
      return Results.success("Envers was successfully setup for the current project!");
   }
This will result in a SUCCESS: message in the command line interface and a green popup in the JDBS after our command is executed.
Now that we have a command the enables Hibernate Envers, it is time to add another command that will turn on auditing for a given JPA entity.
Adding some UI with the "Envers: Audit entity" command
We will create the class for the new command in the same way that we created the one for "Envers: Setup": with the help of Forge. If you are running the CLI, then simply type:
[envers]$ addon-new-ui-command --named EnversAuditEntityCommand --command-name "Envers: Audit entity" --categories "Auditing"Or alternatively in the JBDS choose Addon: New UI Command, enter EnversAuditEntityCommand in the Type Name field, Envers: Audit entity in the Command name field and add Auditing to the Categories list box:
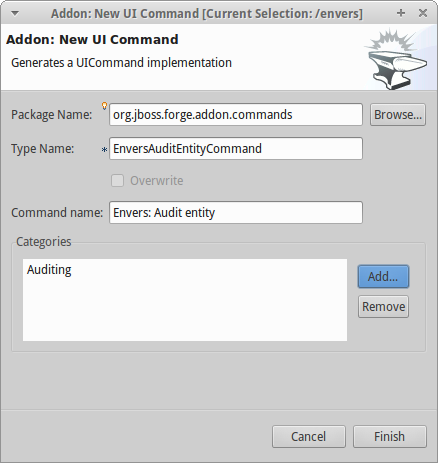
Then open the newly created class and make it extend AbstractProjectCommand instead of AbstractUICommand and also add the unimplemented methods the way you did it in the setup command.
This command will have to receive as input the entity class that has to be audited. To achieve this, we need to do two things:
-
Obtain and configure a
org.jboss.forge.addon.ui.input.UIInputobject from Furnace -
Add our input to the
org.jboss.forge.addon.ui.context.UIBuilderin theinitializeUImethod
Starting from number one, we should add the following member field to our command class:
   @Inject
   @WithAttributes(label = "Entity to audit", required = true)
   private UIInput<JavaResource> auditEntity;
Here we call our field auditEntity. This automatically will add a --auditEntity option to our command in the CLI. The type of the field is UIInput<JavaResource>, which means a few things:
-
The JBDS integration will create a text box control for the audit entity, while the command line interface will expect a single unbounded value
-
The type of the value for this option should be a file that represents a
JavaResource(class, interface or enumeration)
We have also specified some additional attributes with the @WithAttributes annotation:
-
The
labelattribute tells Forge’s JBDS integration to override the field name (auditEntityin this case) with Entity to audit. This will be the actual label of the text box in the IDE. This will not however change the option name on the command line -
The
requiredattribute will not let the user complete the dialog without entering a value for the entity. The well known asterisk character will be displayed along the label in JBDS
After we define the input field, it is time to add it to the command dialog. In order to do that, we need to edit the initializeUI method:
   @Override
   public void initializeUI(UIBuilder builder) throws Exception
   {
      builder.add(auditEntity);
   }
We can tell now Forge to show a Browse button to the right of the input field, which will open the well known type picker of Eclipse. This is done by setting an InputType hint in our input. There are several input types to choose from, but we will need JAVA_CLASS_PICKER:
   @Override
   public void initializeUI(UIBuilder builder) throws Exception
   {
      auditEntity.getFacet(HintsFacet.class).setInputType(InputType.JAVA_CLASS_PICKER);
      builder.add(auditEntity);
   }
In Forge you can also set default values for inputs. This way you can omit specifying its value on the command line and in the IDE it will be pre-filled in the command dialog. You can do that with the setDefaultValue method of the UIInput. In our case the UIInput is generified over the org.jboss.forge.addon.parser.java.resources.JavaResource class, so we’ll have to check whether the current selection in the UI (being the CLI or JBDS) is a file that represents a Java type. If yes, we will set it as the default value of the text field:
   @Override
   public void initializeUI(UIBuilder builder) throws Exception
   {
      auditEntity.getFacet(HintsFacet.class).setInputType(InputType.JAVA_CLASS_PICKER);
      Object selection = builder.getUIContext().getInitialSelection().get();
      if (selection instanceof JavaResource)
         auditEntity.setDefaultValue((JavaResource) selection);
      builder.add(auditEntity);
   }
Now that the command interface is ready, we can go on and implement the execute method. First, we should get the value entered in the text field and convert it to a JavaResource, then we will extract the JavaClassSource out of it so that we can manipulate things like annotations:
   @Override
   public Result execute(UIExecutionContext context) throws Exception
   {
      JavaResource javaResource = auditEntity.getValue().reify(JavaResource.class);
      JavaClassSource javaClass = javaResource.getJavaType();

   }
Next we will check whether the chosen class has already the Audited annotation and if not, will add it to that. At the end we’ll save the new content and will return successful result:
   @Override
   public Result execute(UIExecutionContext context) throws Exception
   {
      JavaResource javaResource = auditEntity.getValue().reify(JavaResource.class);
      JavaClassSource javaClass = javaResource.getJavaType();
      if (!javaClass.hasAnnotation("org.hibernate.envers.Audited")) {
         javaClass.addAnnotation("org.hibernate.envers.Audited");
      }
      javaResource.setContents(javaClass);
      return Results.success(
          "Entity " + javaClass.getQualifiedName() + " was successfully audited");
   }
But what if the user enters invalid input? This could be a file that does not exist, or is not a class or is not a JPA entity. We’ll implement the validate(UIValidationContext validator) method to handle such situations. Whenever it finds illegal input, it will add a validation error to the validator parameter. This will raise an error message if the command executes in the CLI; JBDS will show an error message and disable the Finish button of the dialog until the illegal value is corrected. This is how we implement the method:
   @Override
   public void validate(UIValidationContext validator)
   {
      super.validate(validator);
      try
      {
         if (!auditEntity.getValue().reify(JavaResource.class).getJavaType()
               .hasAnnotation(Entity.class))
         {
            validator.addValidationError(auditEntity,
                  "The selected class must be JPA entity");
         }
      }
      catch (FileNotFoundException e)
      {
         validator.addValidationError(auditEntity,
               "You must select existing JPA entity to audit");
      }
   }
Finally, we want to avoid some compilation errors in the project where we will run this command. So it should be only available for execution if the user has called the setup command first, i.e. if the current project has dependency to Hibernate Envers. You can implement this enabling and disabling in several ways. We will show one of these: by implementing the isEnabled method. There we will again obtain the DependencyFacet and will ask it whether the desired dependency is installed. If this method returns false, the Forge commands wizard will not list the Audit entity command and it will not be available in the command completion in CLI. This is the implementation:
   @Override
   public boolean isEnabled(UIContext context)
   {
      Dependency dependency = DependencyBuilder
                               .create("org.hibernate")
                               .setArtifactId("hibernate-envers");
      return getSelectedProject(context).getFacet(DependencyFacet.class)
               .hasEffectiveDependency(dependency);
   }
Our first addon is ready. We can now build it, deploy it and run it on the Java EE project that we created in the beginning of this chapter.
|
Note
|
All the code manipulation that you’ve just seen come from an API called Roaster. Roaster is a library that allows easy parsing of java source files, introducing a fluent interface to manipulate Java source files, like adding fields, methods, annotations and so on. You can use it outside Forge if you want. It’s just an external API, smart enough to parse and manage Java source files. Give it a try. |
Installing and trying the Envers addon
Once we have our basic functionality, we can build and install our new addon. For that we should use Forge’s addons addon. It has a very handy command: Addon: Build and install. You can run it from the command line, or the IDE:
$ addon-build-and-installIf you don’t specify the project-root parameter, Forge will look for the sources of your addon in the current folder. If this is not the intended behavior, in the CLI run the command like that:
$ addon-build-and-install --project-root <path-to-the-addon-sources>In JBDS, either select the addon project before running the command, or specify the correct path in the command dialog:
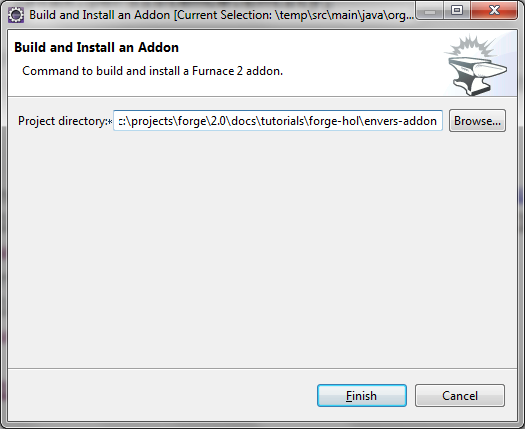
This will trigger a build of the addon, and if it is successful, Forge will install it in its addon repository. You don’t have to restart the tool; Forge it will automatically load the new software once it is deployed. After you see the success message, you can re-run the Forge quick access menu and will see the new command in the command list:
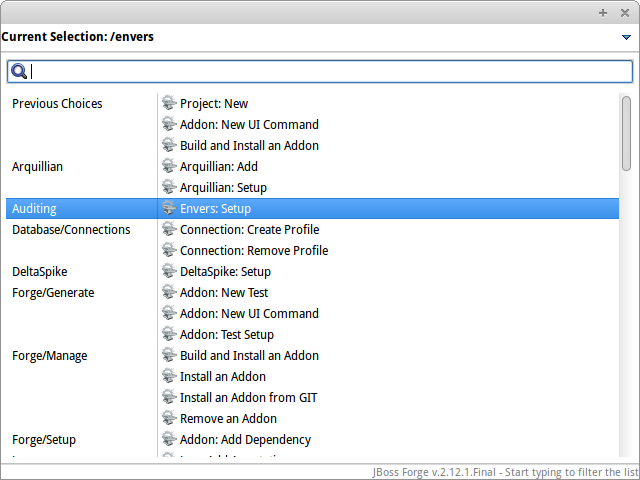
Now you can set up Hibernate Envers and open one of the JPA entities that you generated before starting to develop this addon, e.g. Country. You should be able to call now the other command. In the CLI:
[Country.java]$ envers-audit-entityOr in JBDS press Ctrl + 4 (or CMD + 4 on Mac) and then pick the Envers: Audit entity from the command menu. Notice that the class that you opened in the editor (org.jboss.forge.hol.petstore.model.Country) was selected automatically for you:
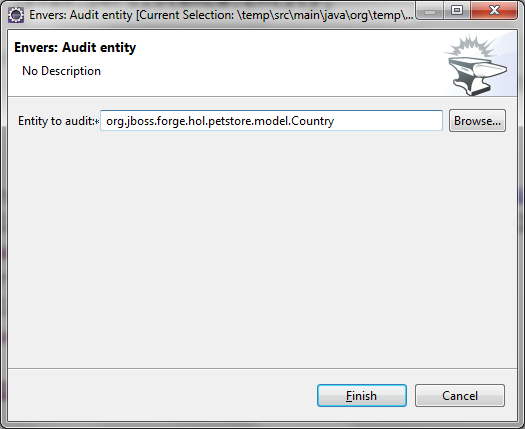
Just hit Enter and the entity will get the @Audited annotation.
Voila! :)
Forge configuration and Forge command execution listeners
In this final section of this chapter we will show you some more features that you could use when developing Forge addons. In order to showcase those, we will add a new requirement to the envers addon. Suppose that we want when we set it up to state that we want every new JPA entity that we create to be automatically audited. This means that the Envers: Setup command should be executable more than once, but it should add the Hibernate Envers dependency in the POM only the first time it was executed.
So, our first job is to enhance our setup command with UI in the form of a checkbox that asks the user whether they
want their JPA entities to be automatically auditable. We’ll use again the familiar UIInput class, but this time
we’ll generify it with Boolean. This will tell the IDE integration of Forge to automatically create a checkbox:
   @Inject
   @WithAttributes(label = "Audit automatically new entities",
      description = "Automatically make an entity auditable after it is created")
   private UIInput<Boolean> enableAutoAudit;
Let’s now add the checkbox to the command dialog using the UIBuilder:
   @Override
   public void initializeUI(UIBuilder builder) throws Exception
   {
      builder.add(enableAutoAudit);
   }
Next, we are going to make it possible running the setup command numerous times without polluting our POM file with as many dependencies to Hibernate Envers. For that we are going to use something as familiar - the DependencyFacet:
   @Override
   public Result execute(UIExecutionContext context) throws Exception
   {
      Dependency dependency = DependencyBuilder
                     .create("org.hibernate")
                     .setArtifactId("hibernate-envers")
                     .setVersion("4.3.6.Final")
                     .setScopeType("provided");
      if (!getSelectedProject(context).getFacet(DependencyFacet.class)
                                      .hasDirectDependency(dependency))
      {
         dependencyInstaller.install(getSelectedProject(context), dependency);
      }

      return Results.success("Envers was successfully setup for the current project!");
   }
Finally we want to tell potentially other addons and commands whether the user wants or not to automatically add
auditing to newly created JPA entities. For that we can use Forge’s configuration. It is file based key-value-pair API, which can be used for storing project or Forge settings. The pairs are stored in .forge_settings file in the project root directory (this is the only non-project artifact that Forge creates) or in ~/.forge/forge.xml directory if it is the global Forge configuration.
In order to get hold of the project configuration, you need to ask the ConfigurationFacet for it:
      Configuration config = getSelectedProject(context)
               .getFacet(ConfigurationFacet.class)
.getConfiguration();|
Tip
|
the global Forge configuration is available through CDI injection. Just inject the org.jboss.forge.addon.configuration.Configuration API:
|
   @Inject
   private Configuration config;
Using the configuration API is straightforward. We can add this line in the execute method just before the return
statement and it will add the boolean value of the checkbox to the project configuration file:
config.setProperty("autoAudit", enableAutoAudit.getValue());Now, whenever and wherever we want to find whether the user has decided to automatically audit new JPA entities, we’ll just need to lookup the autoAudit entry in the project configuration.
We can furthermore enhance the UI of our command by reading the configuration upon building it and finding out what is the current value of autoAudit. Based on that we can change the default value of our checkbox. For example, if the user has already run the setup command and has checked the checkbox, the next time when they run it, we want it checked rather than unchecked. As usually we want to take care of the situation when the entry is not available at all, i.e. the property is null, by providing a default value to the getBoolean method:
      Configuration config = getSelectedProject(builder)
               .getFacet(ConfigurationFacet.class)
               .getConfiguration();
      enableAutoAudit.setDefaultValue(config.getBoolean("autoAudit", false));
Now it is time for the final step in our journey: implementing automatic auditing of JPA entities. What we want now is every time the user creates a new entity class using Forge’s JPA: New Entity command, to instrument that class with the @Audited annotation.
If you want to react on the execution of a Forge command, you should implement the CommandExecutionListener
interface. Its methods give you hooks to the point before a certain command is executed as well as after the execution completes. There are a couple of methods for the latter: once for successful and another one for erroneous outcome:
public class JpaEntityCreationListener implements CommandExecutionListener
{
   @Override public void preCommandExecuted(UICommand uiCommand,
         UIExecutionContext uiExecutionContext)
   {
   }

   @Override public void postCommandExecuted(UICommand uiCommand,
         UIExecutionContext uiExecutionContext, Result result)
   {
   }

   @Override public void postCommandFailure(UICommand uiCommand,
         UIExecutionContext uiExecutionContext, Throwable throwable)
   {
   }
}
In our case we’ll just want to implement the postCommandExecuted method. We want it to do its work only if the
current command is JPA: New Entity
      String commandName = uiCommand
               .getMetadata(uiExecutionContext.getUIContext())
               .getName();
      if (commandName.equals("JPA: New Entity"))
      {
      }
Next we want to get hold of the project configuration to check whether automatic auditing was selected by the user. It was easy in the AbstractProjectCommand descendants to get the selected project with the respective utility method and then to obtain the configuration facet from there. Now we have to go through the Projects.getSelectedProject static factory method for that. It needs to get a project factory, which luckily we can inject. It would be also safe to check whether it is null and only then proceed to the entity instrumentation:
   @Inject
   private ProjectFactory projectFactory;

   @Override public void postCommandExecuted(UICommand uiCommand,
         UIExecutionContext uiExecutionContext, Result result)
   {
      String commandName = uiCommand
               .getMetadata(uiExecutionContext.getUIContext())
               .getName();
      if (commandName.equals("JPA: New Entity") && projectFactory != null)
      {
         Configuration configuration = Projects
                  .getSelectedProject(projectFactory, uiExecutionContext.getUIContext())
                  .getFacet(ConfigurationFacet.class)
                  .getConfiguration();
      }
   }
Now with the Configuration instance at hand we can go on and check what the user preference is:
         if (configuration.getBoolean("autoAudit", false))
         {
         }
We’ll finally take advantage of the fact that Forge automatically selects a newly created class as the current
resource. So, we’ll get the current selection, we’ll cast it to JavaResource and we’ll basically do the same thing we did in the Envers: Audit entity command:
         if (configuration.getBoolean("autoAudit", false))
         {
            try {
               JavaResource resource = (JavaResource) uiExecutionContext
                        .getUIContext().getSelection().get();
               JavaClassSource javaClass = resource.getJavaType();
               if (!javaClass.hasAnnotation("org.hibernate.envers.Audited")) {
                  javaClass.addAnnotation("org.hibernate.envers.Audited");
               }
               resource.setContents(javaClass);
            } catch (FileNotFoundException fnfe) {
               fnfe.printStackTrace();
            }
         }
That’s it. You can now try what you have done.
For your reference, the full source code of the Forge Envers addon can be download from here.
The end
This is the end of our hands on lab, but it’s the begining of a new journey: a world of productivity… even with Java EE. We hope you enjoyed it and that it helped you in discovering and learning more about JBoss Forge.
Appendix
Acknowledgements
The following JBoss Forge community members have contributed, one way or another, to this hands-on lab:
-
Antonio Goncalves (@agoncal)
-
Daniel Cunha (@dvlc_)
-
George Gastaldi (@gegastaldi)
-
Ivan St. Ivanov (@ivan_stefanov)
-
Koen Aers (@koentsje)
-
Lincoln Baxter III (@lincolnthree)
References
-
JBoss Forge home page (https://forge.jboss.org)
-
JBoss Forge Github repository (https://github.com/forge)
-
JBoss Forge forum (https://developer.jboss.org/en/forge)
-
JBoss Forge add-ons (http://forge.jboss.org/addons)
-
Roaster (https://github.com/forge/roaster)
-
Hands-on-lab Github repository (https://github.com/forge/docs/tree/master/tutorials/forge-hol)
-
Hands-on-lab PDF (https://github.com/forge/docs/blob/master/tutorials/forge-hol/docs/forge-hol.pdf)
-
Hands-on-lab Envers add-on (https://github.com/forge/docs/tree/master/tutorials/forge-hol/envers-addon)
-
Hands-on-lab Petstore script (https://github.com/forge/docs/tree/master/tutorials/forge-hol/script)
-
Petstore Java EE 7 (https://github.com/agoncal/agoncal-application-petstore-ee7)
Revision History
Version 0.1
-
Creation of this material
-
Using JBoss Forge 2.12.x
-
Used during the conference Devoxx Belgium 2014
Version 0.2
-
Upgrade to Forge 3.0.0.Beta2
Version 0.3
-
Added stacks information
-
Updated CLI Commands Quick Reference
Version 0.4
-
Images are now Center-aligned
Version 0.5
-
Updated to 3.0.0.CR1
CLI Commands Quick Reference
Category |
Command |
Comment |
Configuration |
config-clear |
|
Configuration |
config-list |
|
Configuration |
config-set |
|
Database/Connections |
connection-create-profile |
Command to create a database connection profile. |
Database/Connections |
connection-remove-profile |
Command to remove a database connection profile. |
Forge/Generate |
addon-new-annotated-ui-command |
Generates an annotated UICommand implementation |
Forge/Generate |
addon-new-test |
Generates a Furnace test case for an addon |
Forge/Generate |
addon-new-ui-command |
Generates a UICommand implementation |
Forge/Generate |
addon-test-setup |
Add addon test setup to this project |
Forge/Manage |
addon-build-and-install |
Command to build and install a Furnace 2 addon. |
Forge/Manage |
addon-install |
Command to install a Furnace 2 addon. |
Forge/Manage |
addon-install-from-git |
Command to build and install a Furnace 2 addon. |
Forge/Manage |
addon-list |
Command to list all currently installed Addons. |
Forge/Manage |
addon-remove |
Command to remove a Furnace 2 addon. |
Forge/Manage |
addon-update |
Command to update a Furnace 2 addon. It may end up updating multiple addons. |
Forge/Manage |
forge-update |
Update this forge installation |
Forge/Manage |
forge-update-abort |
Aborts a previous forge update |
Forge/Setup |
addon-add-dependency |
Adds the provided addon as a dependency to the selected project |
Java |
java-add-annotation |
Add annotation to class, property or method. |
Java |
java-add-enum-const |
Adds an Enum constant to an Enum class |
Java |
java-format-sources |
command to format a file (or folder recursively) of Java source files |
Java |
java-generate-equals-and-hashcode |
Generates equals and hashcode for the given class |
Java |
java-generate-getters-and-setters |
Generates mutators and accessors for the given class |
Java |
java-new-annotation |
Creates a new Java Annotation |
Java |
java-new-class |
Creates a new Java Class |
Java |
java-new-enum |
Creates a new Java Enum |
Java |
java-new-enum-const |
Creates a new Java Enum constant |
Java |
java-new-exception |
Creates a new Java Exception |
Java |
java-new-field |
Creates a new field |
Java |
java-new-interface |
Creates a new Java Interface |
Java |
java-new-method |
Generates methods for the given Java class |
Java |
java-new-package |
Creates a new package |
Java |
java-set-default-formatter |
Sets the default formatter for the Java resources |
Java EE |
javaee-setup |
Setup Java EE in your project |
Java EE/Bean Validation |
constraint-add |
Add a Bean Validation constraint |
Java EE/Bean Validation |
constraint-new-annotation |
Create a Bean Validation constraint annotation |
Java EE/Bean Validation |
constraint-new-group |
Create a Bean Validation group |
Java EE/Bean Validation |
constraint-new-payload |
Create a Bean Validation payload |
Java EE/Bean Validation |
constraint-setup |
Setup Bean Validation in your project |
Java EE/CDI |
cdi-add-injection-point |
Adds a new injection point field to a bean |
Java EE/CDI |
cdi-add-observer-method |
Adds a new observer method to a bean |
Java EE/CDI |
cdi-list-alternatives |
|
Java EE/CDI |
cdi-list-decorators |
|
Java EE/CDI |
cdi-list-interceptors |
|
Java EE/CDI |
cdi-new-annotation-literal |
Creates an Annotation Literal Type |
Java EE/CDI |
cdi-new-bean |
Creates a new CDI Managed bean |
Java EE/CDI |
cdi-new-conversation |
Creates a conversation block in the specified method |
Java EE/CDI |
cdi-new-decorator |
Creates a new CDI Decorator |
Java EE/CDI |
cdi-new-extension |
Creates a new CDI Extension |
Java EE/CDI |
cdi-new-interceptor |
Creates a new CDI Interceptor |
Java EE/CDI |
cdi-new-interceptor-binding |
Creates a new CDI Interceptor Binding annotation |
Java EE/CDI |
cdi-new-qualifier |
Creates a new CDI Qualifier annotation |
Java EE/CDI |
cdi-new-scope |
Creates a new CDI Scope annotation |
Java EE/CDI |
cdi-new-stereotype |
Creates a new CDI Stereotype annotation |
Java EE/CDI |
cdi-setup |
Setup CDI in your project |
Java EE/EJB |
ejb-new-bean |
Create a new EJB |
Java EE/EJB |
ejb-set-class-transaction-attribute |
Set the transaction type of a given EJB |
Java EE/EJB |
ejb-set-method-transaction-attribute |
Set the transaction type of a given EJB method |
Java EE/EJB |
ejb-setup |
Setup EJB in your project |
Java EE/JAX-RS |
rest-generate-endpoints-from-entities |
Generate REST endpoints from JPA entities |
Java EE/JAX-RS |
rest-new-cross-origin-resource-sharing-filter |
Generate a Cross Origin Resource Sharing Filter |
Java EE/JAX-RS |
rest-new-endpoint |
Creates a new REST Endpoint |
Java EE/JAX-RS |
rest-setup |
Setup REST in your project |
Java EE/JAX-WS |
soap-new-service |
Create a new JAX-WS Web Service |
Java EE/JAX-WS |
soap-setup |
Setup JAX-WS (SOAP) in your project |
Java EE/JMS |
jms-setup |
Setup JMS in your project |
Java EE/JPA |
jpa-generate-daos-from-entities |
Generate DAOs from JPA entities |
Java EE/JPA |
jpa-generate-entities-from-tables |
Command to generate Java EE entities from database tables. |
Java EE/JPA |
jpa-new-embeddable |
Create a new JPA Embeddable |
Java EE/JPA |
jpa-new-entity |
Create a new JPA Entity |
Java EE/JPA |
jpa-new-entity-listener |
Create a new JPA Entity Listener |
Java EE/JPA |
jpa-new-field |
Create a new field |
Java EE/JPA |
jpa-new-mapped-superclass |
Create a new JPA Mapped Superclass |
Java EE/JPA |
jpa-new-named-query |
Creates a @NamedQuery in a JPA Entity |
Java EE/JPA |
jpa-setup |
Setup JPA in your project |
Java EE/JSF |
faces-new-bean |
Create a new JSF Backing Bean |
Java EE/JSF |
faces-new-converter |
Create a new JSF Converter |
Java EE/JSF |
faces-new-validator |
Create a new JSF Validator |
Java EE/JSF |
faces-new-validator-method |
Create a new JSF validator method |
Java EE/JSF |
faces-set-project-stage |
Set the project stage of this JSF project |
Java EE/JSF |
faces-setup |
Setup JavaServer Faces in your project |
Java EE/JSTL |
jstl-setup |
Setup JSTL in your project |
Java EE/JTA |
jta-setup |
Setup JTA in your project |
Java EE/Security |
security-add-constraint |
Add security constraint |
Java EE/Security |
security-add-login-config |
Adds a login config element to the current project |
Java EE/Security |
security-add-role |
Add security role |
Java EE/Security |
security-remove-role |
Remove security role |
Java EE/Servlet |
servlet-new-filter |
Creates a new Servlet Filter |
Java EE/Servlet |
servlet-new-servlet |
Creates a new Servlet |
Java EE/Servlet |
servlet-setup |
Setup Servlet API in your project |
Java EE/WebSocket |
websocket-new-server-endpoint |
Create a new WebSocket Server Endpoint |
Java EE/WebSocket |
websocket-setup |
Setup WebSocket API in your project |
Java/ServiceLoader |
service-register-as-serviceloader |
Register a Java type as a service implementation. |
Maven |
archetype-add |
Adds an archetype catalog to the Forge configuration file |
Maven |
archetype-list |
Lists the registered archetype catalogs from the Forge configuration file |
Maven |
archetype-remove |
Removes an archetype catalog from the Forge configuration file |
Project |
project-list-facets |
Lists the facets associated with the current project |
Project/Build |
build |
Build this project |
Project/Generation |
project-new |
Create a new project |
Project/Manage |
project-add-dependencies |
Add one or more arguments to the current project. |
Project/Manage |
project-add-managed-dependencies |
Add one or more managed dependencies to the current project. |
Project/Manage |
project-add-repository |
Add a repository to the current project descriptor. |
Project/Manage |
project-has-dependencies |
Check one or more arguments in the current project. |
Project/Manage |
project-has-managed-dependencies |
Check one or more managed dependencies in the current project. |
Project/Manage |
project-remove-dependencies |
Remove one or more arguments from the current project. |
Project/Manage |
project-remove-managed-dependencies |
Remove one or more managed arguments from the current project. |
Project/Manage |
project-remove-repository |
Remove a repository configured in the current project descriptor. |
Project/Manage |
project-set-compiler-version |
Set the java sources and the target compilation version |
Project/Stack |
project-list-stacks |
Lists the stacks associated with the current project |
SCM / GIT |
git-checkout |
Checkout a branch from GIT repository or create a new one |
SCM / GIT |
git-clone |
Clone a GIT repository |
SCM / GIT |
git-remove-pattern |
Remove pattern from .gitignore |
SCM / GIT |
git-setup |
Prepares the project for functioning in GIT context |
SCM / GIT |
gitignore-add-pattern |
Add pattern to .gitignore |
SCM / GIT |
gitignore-create |
Create .gitignore from templates |
SCM / GIT |
gitignore-edit |
Open .gitignore and edit it |
SCM / GIT |
gitignore-list-patterns |
List available .gitignore patterns |
SCM / GIT |
gitignore-list-templates |
List all available .gitignore templates |
SCM / GIT |
gitignore-setup |
Create .gitignore files based on template files from https://github.com/github/gitignore.git. |
SCM / GIT |
gitignore-update-templates |
Update the local .gitignore template repository |
Scaffold/Generate |
scaffold-generate |
Generates the scaffold |
Scaffold/Setup |
scaffold-setup |
Setup the scaffold |
Shell |
cat |
The cat utility reads files sequentially, writing them to the standard output. The file operands are processed in command-line order. |
Shell |
cd |
Change the current directory |
Shell |
clear |
Clear the console |
Shell |
cp |
Copy a file or directory |
Shell |
echo |
display a line of text |
Shell |
edit |
Edit files with the default system editor |
Shell |
exit |
Exit the shell |
Shell |
ls |
List files |
Shell |
mkdir |
Create a new directory. |
Shell |
mv |
Move a file or directory |
Shell |
open |
Open files with the default system application |
Shell |
pwd |
Print the full filename of the current working directory. |
Shell |
rm |
Remove (unlink) the FILE(s). |
Shell |
run |
Execute/run a forge script file. |
Shell |
touch |
Create a new file or modify file timestamp. |
Shell |
track-changes |
Initiate a transaction for each executed command. |
Shell |
transaction-commit |
Commits a transaction |
Shell |
transaction-rollback |
Rollbacks a transaction |
Shell |
transaction-start |
Starts a transaction |
Shell |
wait |
Wait for ENTER. |
Uncategorized |
about |
Display information about this forge. |
Uncategorized |
command-list |
List all available commands. |
Uncategorized |
date |
print current date |
Uncategorized |
system-property-get |
Get one or all system properties |
Uncategorized |
system-property-set |
Set a system property |
Uncategorized |
version |
Displays the current Forge version. |
Uncategorized |
wait |
Wait for ENTER. |