figure 1
In this tutorial you will learn how to update the widget that we created in tutorial-01 and extended with dynamic contents in tutorial-02 such that you can change its contents from within an AIMMS model. We will go into a little more details on the AWF Option Mechanism that was previously introduced. Like in the previous tutorials, we will leave out much of the technical details and underlying design and only explain the essential things in order to get you up-and-running as soon as possible. But this tutorial will be longer and will go into more details than the previous tutorials.
To make the most out of this tutorial, it is important that you meet a couple of prerequisites.
First of all, we are going to assume that you already familiarized yourself a bit with the AIMMS WebUI. Both with the end-usage and the app-development. That you have a recent AIMMS and that you have it running in your set-up.
Since this is a (software) development tutorial, we are also assuming that you have experience in writing software in a generic programming language, and, that you have a basic knowledge on HTML5 technologies (HTML5 DOM, CSS, Javascript, and the likes). It is also beneficial, however not required, if you are familiar with jQuery and, to lesser extent, jQuery UI, as AIMMS WebUI is built on top of these technologies.
Finally, since this tutorial builds on the previous tutorial, we expect that you have done that tutorial first. If you have not done so yet, here is a link to tutorial-02.
Previously, it was stated that there are two ways of having dynamic contents in an AWF widget. The easiest method being through the use of options and the other method is to use data from the AIMMS model. The distinction between these two methods was made for the sake of simplicity. In reality, both methods use the AWF Option Mechanism, though in a slightly different way. To understand the subtle differences, it is important to understand how an option, in AWF, gets a value, and, what actually that value in AWF encompasses.
Model¹ data is bound to an AWF option through a process called data binding.
Data binding is the process that establishes a connection between the application UI (User Interface)
and business logic. If the settings and notifications are correctly set, the data reflects changes when made.
It can also mean that when the UI is changed, the underlying data will reflect that change.²
Currently in AWF, an option can be bound to one of the following two sources of data:
¹ Here we, as in tutorial-01, mean model in a broad and abstract sense, but you can read it as the model and/or
its model data in AIMMS.
² Please see WikipediA
for more information.
Recall from tutorial-02 that an option in AWF consists of:
In addition to this, an option value can have three different states:
The specified value of an option is the option value in its serialized form. It is either null¹, or, a (JSON/JavaScript) string literal. It has the following syntax:
<data-provider>:<JSON>
Where:Notes:
- data-provider is the name of the provider for the data. Currently in AWF there are two data-providers available: literal² and aimms.
- JSON is the object, serialized as JSON, that, together with the option type, is used by AWF data-binding to resolve the final value.
- Examples of specified values:
- literal:123
- literal:"Hello AIMMS!"
- aimms:{"contents": ["MyIdentifierA", "MyIdentifierB"]}
- In AWF databinding, small simple type-coercion³ is performed when possible. This means that a number will be resolved to a string if the option type is a string, even when the input is a numerical value, and, vice versa (restrictions apply).
- For the literal data-provider, the resolved value is typically obtained by stripping the literal prefix from the specified value.
The parsed value of an option is an intermediate value state between specified and resolved and is used to aid in the transition between the two.
The resolved value of an option is the actual option value which a widget typically uses to update its associated DOM element.
¹ Recall from tutorial-02 that null denotes that the widget should use a default value that is
intrinsic to the specific widget.
² In tutorial-02 the literal data-provider was used.
³ The term type coercion is typically used to denote an automatic or implicit form of type casting (see
Wikipedia).
Recall from tutorial-02 that an option editor provides a means to change the value of an option from the UI. To put this more precise, an option editor typically uses the resolved value to draw itself (i.e. its DOM tree), and, when a value is changed by the user using that option editor, the option editor subsequently uses the parsed value to update the specified value of the option¹. AWF data-binding then picks up the change, potentially causing a new value to resolve and -hence- the widget to be updated.
¹ We will go into these details later, when we show how to write your own option editor in a future tutorial.
Now that we know a little more about the AWF Option Mechanism and its underlying data-binding mechanism, we can update our widget such that it gets its value from AIMMS. But first let's have a quick look at the current state of our widget and see the theory from the previous sections in action.
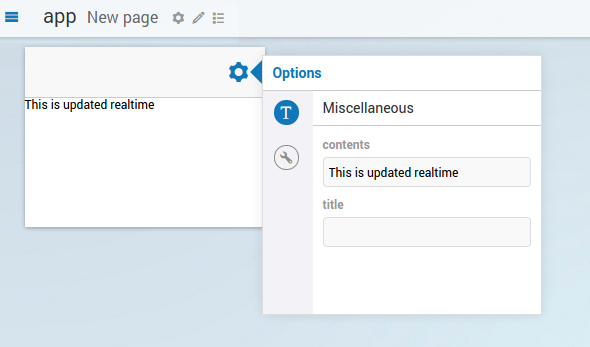
We start by opening the option dialog again:
figure 1
Now click on the tool icon
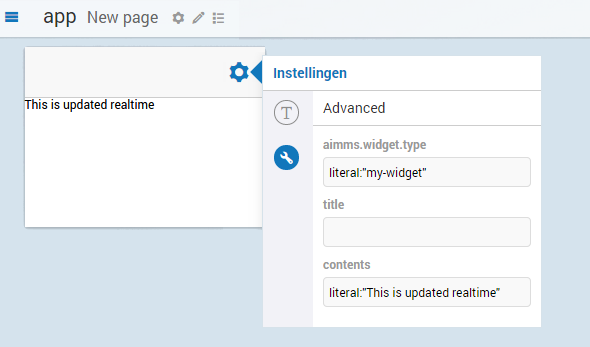 figure 2
Please observe the specified value for the contents option. If we recall from the theoretical section that the specified value of an option has the form: <data-provider>:<JSON>, we can see that the current version of our widget is using the literal data provider:
| data-provider | JSON | literal | "This is updated realtime" |
|---|
Now let's see how easy it is to hook up an identifier from the AIMMS model to our widget. For that, we switch to the AIMMS data provider and tell it to resolve the value to that of the TotalTransportCost variable from the model:
| data-provider | JSON | aimms | {"contents":["TotalTransportCost"]} |
|---|
In other words, change the specified value of the contents option using the advanced option editor to: aimms:{"contents":["TotalTransportCost"]}, like so¹ (do not press enter yet):
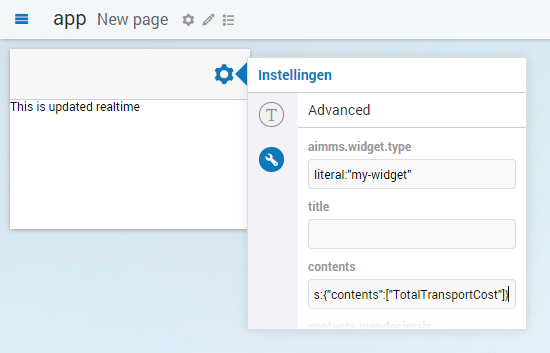 figure 3
¹ Please note that the specified value here gets truncated due to limited space in the optiondialog
Then, when you press enter, the contents of the widget updates:
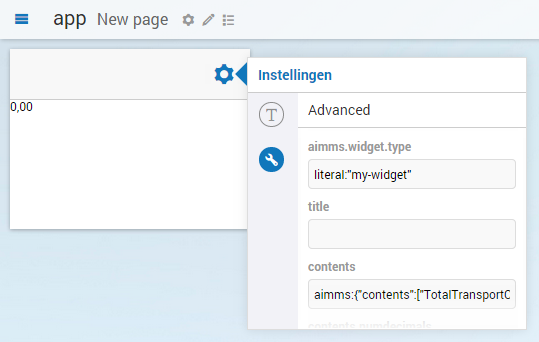 figure 4
0,00! That may not seem much, but this value is coming from AIMMS! (You can check it if you wish.) And, because we specified the option type to be a string while the underlying data in the model is a numerical value, AWF even coerced the type for us to a nicely formatted string!
If you're not convinced yet, let's let AIMMS update the model. For this, we add a button to our page. Click the
pencil icon in the top toolbar
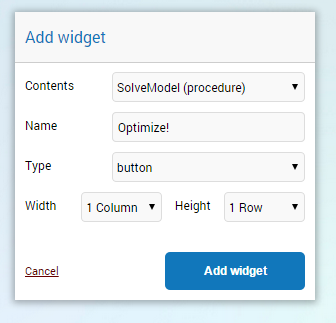 figure 5
By default the title of the button is the same as the name of the procedure, but let's use a more inspiring name:
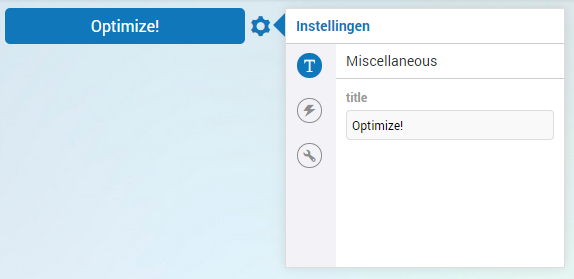 figure 6
After adding and configuring our new button, the page should look like this:
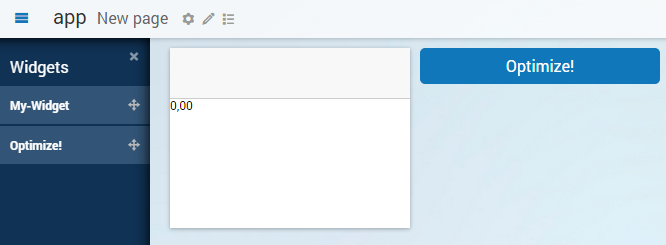 figure 7
Now, when we press the new Optimize! button, we instruct AIMMS to calculate the optimal solution and update the TotalTransportCost variable that we show in our widget. Let's see what happens...
 figure 8
Et voilà! After pressing the button, our widget updates as expected. And there you have it, your first widget with data from AIMMS!
This was quite a big tutorial. Let's do a small recap of what we've learnt today. AWF allows you to bind data to your widget through the use of options. Two data-providers are readily available in AWF, one for literal values and one for values coming from aimms.
An option value has three states (or forms), specified, parsed and resolved. In this tutorial, we did not have to change any code of our widget, we only changed the specified value of our option and changed the data-provider from literal to aimms.
Next time, we will continue on this path and show you how to retrieve multi-dimensional data from AIMMS.